Sunday, May 22, 2016

FRUITS

My daughter asked me to design a series of crochet edibles.  This is the next set of items in this series.  This pattern is a variety of fruits.  It includes—strawberry, apple, pear, closed banana, open banana, orange, lemon, lime, grapes, and pineapple.  This pattern also includes a basket to carry them in.  The basket can be made in any color.  My daughter loves red and blue, so I used red and blue sparkle yarn.

MATERIALS:
Worsted weight yarn:  Cherry red, paddy green, spring green, coffee brown, yellow, white, orange, medium thyme, warm brown, lavender and any color for the basket.
E, F, G, and J crochet hook
Polyester Fiberfill
Tapestry needle
STRAWBERRY:
BODY:
Rd 1: With cherry red, ch 2, 4 sc in second ch from hook working around ch.  (4)
Rd 2: 2 sc in each sc around.  (8)
Rd 3: (sc in next sc, 2 sc in next sc) around.  (12)
Rd 4: (sc in next 2 sc, 2 sc in next sc) around.  (16)
Rd 5: sc in each sc around.  (16)
Rd 6: (sc in next 3 sc, 2 sc in next sc) around.  (20)
Rd 7: sc in each sc around.  (20)
Rd 8: (sc in next 4 sc, 2 sc in next sc) around.  (24)
Rds 9-10: sc in each sc around.  (24)
Rd 11: (sc in next 2 sc, sc2tog) around.  (18)
Rd 12: (sc in next sc, sc2tog) around.  (12)
STUFF STRAWBERRY FIRMLY.
Rd 13: sc2tog around.  (6)
Finish off leaving a long tail.  Weave tail through sc of Rd 13, pull tightly and secure.  Weave in ends.

STEM:
Rw 1: With paddy green, ch 3, sc in second ch from hook and in next ch.  (2)
Finish off leaving a long tail.  Sew STEM to top of STRAWBERRY.

LEAVES AND SEEDS:
Embroider 5 leaves in green around top of STRAWBERRY using a lazy daisy stitch and a second lazy daisy stitch on top of first.  Embroider seeds in yellow using short stitches in random places all over STRAWBERRY.
APPLE:
BODY:
Rd 1: With cherry red or spring green, 9 sc in magic ring.  (9)
Rd 2: 2 sc in each sc around.  (18)
Rd 3: sc in each sc around.  (18)
Rd 4: (sc in next sc, 2 sc in next sc) around.  (27)
Rd 5: sc in each sc around.  (27)
Rd 6: (sc in next 2 sc, 2 sc in next sc) around.  (36)
Rd 7: sc in each sc around.  (36)
Rd 8: (sc in next 3 sc, 2 sc in next sc) around.  (45)
Rds 9-18: sc in each sc around.  (45)
Rd 19: (sc in next 3 sc, sc2tog) around.  (36)
Rd 20: sc in each sc around.  (36)
Rd 21: (sc in next 2 sc, sc2tog) around.  (27)
Rd 22: sc in each sc around.  (27)
Rd 23: (sc in next sc, sc2tog) around.  (18)
STUFF APPLE FIRMLY.
Rd 24: sc in each sc around.  (18)
Rd 25: sc2tog around.  (9)
Finish off leaving a long tail.  Weave tail through sc of Rd 25, pull tightly, and secure.  Sew through center of APPLE from top tightly pulled stitches to sc of beginning magic ring and back to top, pull tightly causing both ends to indent and secure.  Weave in ends.

STEM AND LEAF:
Rw 1: With paddy green, ch 5, sc in second ch from hook and in each ch across.  (4)
Rw 2: Ch 1, turn; sc in next sc, leave remaining sc unworked.  (1)
Rw 3: Ch 1, turn; 3 sc in next sc.  (3)
Rw 4: Ch 1, turn; 2 sc in next sc, sc in next sc, 2 sc in next sc.  (5)
Rw 5: Ch 1, turn; sc2tog, sc in next sc, sc2tog.  (3)
Rw 6: Ch 1, turn; sc3tog.  (1)
Finish off.  Weave in ends.  Sew STEM AND LEAF to top of APPLE.
PEAR:
BODY:
Rd 1: With spring green, 7 sc in magic ring.  (7)
Rd 2: 2 sc in each sc around.  (14)
Rd 3: (sc in next sc, 2 sc in next sc) around.  (21)
Rd 4: (sc in next 2 sc, 2 sc in next sc) around.  (28)
Rd 5: (sc in next 3 sc, 2 sc in next sc) around.  (35)
Rd 6: sc in each sc around.  (35)
Rd 7: (sc in next 4 sc, 2 sc in next sc) around.  (42)
Rds 8-13: sc in each sc around.  (42)
Rd 14: (sc in next 4 sc, sc2tog) around.  (35)
Rd 15: (sc in next 3 sc, sc2tog) around.  (28)
Rd 16: (sc in next 5 sc, sc2tog) around.  (24)
Rds 17-22: sc in each sc around.  (24)
Rd 23: (sc in next 2 sc, sc2tog) around.  (18)
Rd 24: sc in each sc around.  (18)
Rd 25: (sc in next sc, sc2tog) around.  (12)
STUFF PEAR FIRMLY.
Rd 26: sc in each sc around.  (12)
Rd 27: sc2tog around.  (6)
Finish off leaving a long tail.  Weave tail through sc of Rd 27, pull tightly and secure.  Weave in ends.

STEM AND LEAF:
Rw 1: With coffee brown, ch 5, sc in second ch from hook and in each ch across.  (4)  Change to paddy green.
Rw 2: Ch 1, turn; sc in next sc, leave remaining sc unworked.  (1)
Rw 3: Ch 1, turn; 3 sc in next sc.  (3)
Rw 4: Ch 1, turn; 2 sc in next sc, sc in next sc, 2 sc in next sc.  (5)
Rw 5: Ch 1, turn; sc2tog, sc in next sc, sc2tog.  (3)
Rw 6: Ch 1, turn; sc3tog.  (1)
Finish off.  Weave in ends.  Sew STEM AND LEAF to top of PEAR.
BANANA (CLOSED):
Rd 1: With yellow and F hook, ch 2, 3 sc in second ch from hook working around ch.  (3)
Rds 2-3: 2 sc in each sc around.  (12 after Rd 3)
Rd 4: sc in each sc around.  (12)
Rd 5: 2 sc in next sc, sc in next 10 sc, 2 sc in next sc.  (14)
Rd 6: sc in each sc around.  (12)
Rd 7: 2 sc in next sc, sc in next 12 sc, 2 sc in next sc.  (16)
Rd 8: sc in each sc around.  (12)
Rd 9: 2 sc in next sc, sc in next 14 sc, 2 sc in next sc.  (18)
Rd 10: sc in each sc around.  (12)
Rd 11: 2 sc in next sc, sc in next 16 sc, 2 sc in next sc.  (20)
Rd 12: 2 sc in next 2 sc, sc in next 4 sc, (sc2tog) 4 times, sc in next 4 sc, 2 sc in next 2 sc.  (20)
Rds 13-14: sc in each sc around.  (20)
Rd 15: 2 sc in next 3 sc, sc in next 4 sc, (sc2tog) 4 times, sc in next 4 sc, 2 sc in next sc.  (20)
Rds 16-17: sc in each sc around.  (20)
Rd 18: 2 sc in next 4 sc, sc in next 4 sc, (sc2tog) 4 times, sc in next 4 sc.  (20)
Rds 19-20: sc in each sc around.  (20)
Rd 21: sc in next 2 sc, 2 sc in next 4 sc, sc in next 4 sc, (sc2tog) 4 times, sc in next 2 sc.  (20)
Rds 22-23: sc in each sc around.  (20)
Rd 24: sc in next 4 sc, 2 sc in next 4 sc, sc in next 4 sc, (sc2tog) 4 times.  (20)
Rds 25-26: sc in each sc around.  (20)
Rd 27: sc2tog, sc in next 4 sc, 2 sc in next 4 sc, sc in next 4 sc, (sc2tog) 3 times.  (20)
Rds 28-29: sc in each sc around.  (20)
Rd 30: (sc2tog) twice, sc in next 4 sc, 2 sc in next 4 sc, sc in next 4 sc, (sc2tog) twice.  (20)
Rd 31: sc in each sc around.  (20)
Rd 32: (sc2tog) twice, sc in next 12 sc, (sc2tog) twice.  (16)
Rd 33: (sc2tog) twice, sc in next 8 sc, (sc2tog) twice.  (12)
STUFF BANANA FIRMLY.
Rd 34: (sc2tog) twice, sc in next 4 sc, (sc2tog) twice.  (8)
Rd 35: (sc in next 2 sc, sc2tog) around.  (6)
Rds 36-37: sc in each sc around.  (6)
Finish off leaving a long tail.  Weave tail through sc of Rd 37, pull tightly, and secure.  Weave in ends.
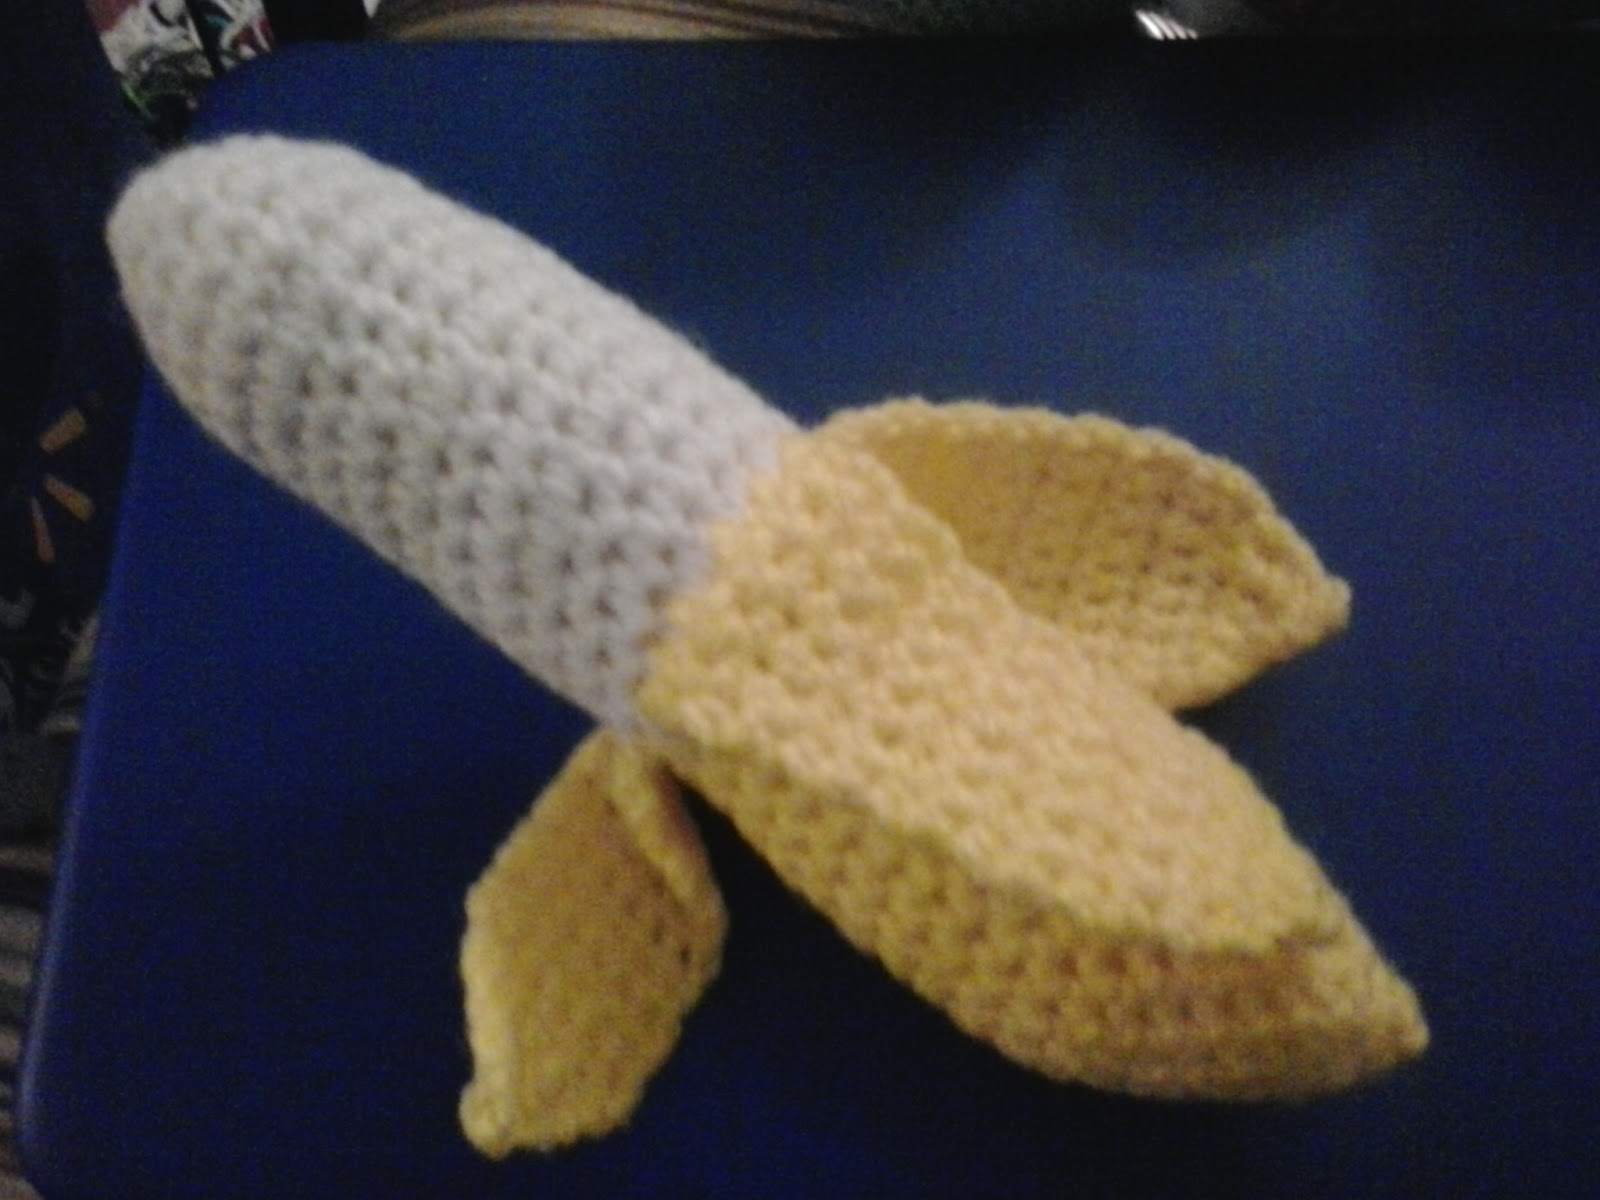
BANANA (OPEN):
BODY:
Rd 1: With yellow and F hook, ch 2, 3 sc in second ch from hook working around ch.  (3)
Rds 2-3: 2 sc in each sc around.  (12 after Rd 3)
Rd 4: sc in each sc around.  (12)
Rd 5: 2 sc in next sc, sc in next 10 sc, 2 sc in next sc.  (14)
Rd 6: sc in each sc around.  (12)
Rd 7: 2 sc in next sc, sc in next 12 sc, 2 sc in next sc.  (16)
Rd 8: sc in each sc around.  (12)
Rd 9: 2 sc in next sc, sc in next 14 sc, 2 sc in next sc.  (18)
Rd 10: sc in each sc around.  (12)
Rd 11: 2 sc in next sc, sc in next 16 sc, 2 sc in next sc.  (20)
Rd 12: 2 sc in next 2 sc, sc in next 4 sc, (sc2tog) 4 times, sc in next 4 sc, 2 sc in next 2 sc.  (20)
Rds 13-14: sc in each sc around.  (20)
Rd 15: 2 sc in next 3 sc, sc in next 4 sc, (sc2tog) 4 times, sc in next 4 sc, 2 sc in next sc.  (20)
Rds 16-17: sc in each sc around.  (20)
Rd 18: 2 sc in next 4 sc, sc in next 4 sc, (sc2tog) 4 times, sc in next 4 sc.  (20)
Rds 19-20: sc in each sc around.  (20)  Change to white after Rd 20.
Rd 21: sc in next 2 sc, 2 sc in next 4 sc, sc in next 4 sc, (sc2tog) 4 times, sc in next 2 sc.  (20)
Rds 22-23: sc in each sc around.  (20)
Rd 24: sc in next 4 sc, 2 sc in next 4 sc, sc in next 4 sc, (sc2tog) 4 times.  (20)
Rds 25-26: sc in each sc around.  (20)
Rd 27: sc2tog, sc in next 4 sc, 2 sc in next 4 sc, sc in next 4 sc, (sc2tog) 3 times.  (20)
Rds 28-29: sc in each sc around.  (20)
Rd 30: (sc2tog) twice, sc in next 4 sc, 2 sc in next 4 sc, sc in next 4 sc, (sc2tog) twice.  (20)
Rd 31: sc in each sc around.  (20)
Rd 32: (sc2tog) twice, sc in next 12 sc, (sc2tog) twice.  (16)
Rd 33: (sc2tog) twice, sc in next 8 sc, (sc2tog) twice.  (12)
STUFF BANANA FIRMLY.
Rd 34: (sc2tog) twice, sc in next 4 sc, (sc2tog) twice.  (8)
Rd 35: (sc in next 2 sc, sc2tog) around.  (6)
Finish off leaving a long tail.  Weave tail through sc of Rd 35, pull tightly, and secure.  Weave in ends.

PEELS (MAKE 3):
PEEL 1:
Rw 1: Working over sc of Rd 20, attach yellow with slip st, ch 1, sc in same sc as slip st, sc in next 5 sc leaving remaining sc unworked.  (6)
Rws 2-13: Ch 1, turn; sc in each sc across.  (6)
Rw 14: Ch 1, turn; sc2tog, sc in next 2 sc, sc2tog.  (4)
Rw 15: Ch 1, turn; sc2tog across.  (2)
Rw 16: Ch 1, turn; sc2tog.  (1)
Finish off.  Weave in ends.
PEEL 2:
Rw 1: Working over sc of Rd 20, attach yellow with slip st in next unworked sc, ch 1, sc in same sc as slip st, sc in next 7 sc leaving remaining sc unworked.  (8)
Rws 2-13: Ch 1, turn; sc in each sc across.  (8)
Rw 14: Ch 1, turn; sc2tog, sc in next 4 sc, sc2tog.  (6)
Rw 15: Ch 1, turn; sc2tog, sc in next 2 sc, sc2tog.  (4)
Rw 16: Ch 1, turn; sc2tog across.  (2)
Rw 17: Ch 1, turn; sc2tog.  (1)
Finish off.  Weave in ends.
PEEL 3:
Rw 1: Working over sc of Rd 20, attach yellow with slip st in next unworked sc, ch 1, sc in same sc as slip st, sc in next 5 sc.  (6)
Rws 2-13: Ch 1, turn; sc in each sc across.  (6)
Rw 14: Ch 1, turn; sc2tog, sc in next 2 sc, sc2tog.  (4)
Rw 15: Ch 1, turn; sc2tog across.  (2)
Rw 16: Ch 1, turn; sc2tog.  (1)
Finish off.  Weave in ends.
ORANGE:
Rd 1: With medium thyme, 6 sc in magic ring, slip st in first sc changing to orange.  (4)
Rd 2: Working in back loops only, ch 1, sc in each sc around.  (6)
Rd 3: 2 sc in each sc around.  (12)
Rd 4: (sc in next sc, 2 sc in next sc) around.  (18)
Rd 5: (sc in next 2 sc, 2 sc in next sc) around.  (24)
Rd 6: (sc in next 3 sc, 2 sc in next sc) around.  (30)
Rd 7: sc in each sc around.  (30)
Rd 8: (sc in next 4 sc, 2 sc in next sc) around.  (36)
Rds 9-10: sc in each sc around.  (36)
Rd 11: (sc in next 5 sc, 2 sc in next sc) around.  (42)
Rds 12-13: sc in each sc around.  (42)
Rd 14: (sc in next 5 sc, sc2tog) around.  (36)
Rd 15: sc in each sc around.  (36)
Rd 16: (sc in next 4 sc, sc2tog) around.  (30)
Rd 17: sc in each sc around.  (30)
Rd 18: (sc in next 3 sc, sc2tog) around.  (24)
Rd 19: (sc in next 2 sc, sc2tog) around.  (18)
Rd 20: (sc in next sc, sc2tog) around.  (12)
STUFF ORANGE FIRMLY.
Rd 21: sc2tog around.  (6)
Finish off leaving a long tail.  Weave tail through sc of Rd 21, pull tightly, and secure.  Weave in ends.
LEMON:
Rd 1: With medium thyme, ch 2, 4 sc in second ch from hook working around ch, slip st in first sc changing to yellow.  (4)
Rd 2: Ch 1, (sc in next sc, 2 sc in next sc) around.  (6)
Rd 3: (sc in next sc, 2 sc in next sc) around.  (9)
Rd 4: (sc in next 2 sc, 2 sc in next sc) around.  (12)
Rd 5: (sc in next sc, 2 sc in next sc) around.  (18)
Rd 6: (sc in next 2 sc, 2 sc in next sc) around.  (24)
Rds 7-8: sc in each sc around.  (24)
Rd 9: (sc in next 3 sc, 2 sc in next sc) around.  (30)
Rds 10-12: sc in each sc around.  (30)
Rd 13: (sc in next 3 sc, sc2tog) around.  (24)
Rds 14-15: sc in each sc around.  (24)
Rd 16: (sc in next 2 sc, sc2tog) around.  (18)
Rd 17: (sc in next sc, sc2tog) around.  (12)
STUFF LEMON FIRMLY.
Rd 18: (sc in next sc, sc2tog) around.  (8)
Rd 19: sc2tog around.  (4)
Finish off leaving a long tail.  Weave tail through sc of Rd 19, pull tightly and secure.  Weave in ends.
LIME:
Rd 1: With medium thyme, ch 2, 4 sc in second ch from hook working around ch, slip st in first sc changing to paddy green.  (4)
Rd 2: Ch 1, (sc in next sc, 2 sc in next sc) around.  (6)
Rd 3: 2 sc in each sc around.  (12)
Rd 4: (sc in next sc, 2 sc in next sc) around.  (18)
Rd 5: (sc in next 2 sc, 2 sc in next sc) around.  (24)
Rd 6: sc in each sc around.  (24)
Rd 7: (sc in next 7 sc, 2 sc in next sc) around.  (27)
Rds 8-10: sc in each sc around.  (27)
Rd 11: (sc in next 7 sc, sc2tog) around.  (24)
Rd 12: sc in each sc around.  (24)
Rd 13: (sc in next 2 sc, sc2tog) around.  (18)
Rd 14: (sc in next sc, sc2tog) around.  (12)
STUFF LIME FIRMLY.
Rd 15: sc2tog around.  (6)
Rd 16: (sc in next sc, sc2tog) around.  (4)
Finish off.  Weave in ends.
GRAPES:
STEM:
PIECE 1:
Rw 1: With warm brown, ch 7, sc in second ch from hook, slip st in next 5 ch.
Rw 2: Turn, (ch 3, slip st in second ch from hook and in next ch, slip st in next slip st on Row 1) 4 times.
Finish off.
PIECE 2:
Rw 1: with warm brown, ch 4, slip st in second ch from hook and in each ch across.
Rw 2: Turn, (ch 3, slip st in second ch from hook and in next ch, slip st in next slip st on Row 1, turn) 3 times.
Finish of leaving a long tail.  Sew PIECE 2 to PIECE 1.

GRAPES (MAKE 8):
Rd 1: With lavender, 6 sc in magic ring.  (6)
Rd 2: (sc in next sc, 2 sc in next sc) around.  (9)
Rds 3-4: sc in each sc around.  (9)
STUFF GRAPES FIRMLY.
Rd 5: (sc2tog) 4 times.
Finish off leaving a long tail.  Sew GRAPES to the STEM ends.

LEAF:
Rd 1: With medium thyme, 12 dc in magic ring, slip st in first dc.  (12)
Rd 2: Ch 3, (dc in same st as joining, ch 2, slip st in second ch from hook, hdc in same st as last dc, hdc in next dc) twice, dc in same st as last dc made, ch 3, slip st in second ch from hook, sc in next ch, 2 dc in same st as last dc, (hdc in next dc, ch 2, slip st in second ch from hook, 2 dc in next dc) twice, slip st in next st.
Finish off leaving a long tail.  Sew LEAF to top of STEM.

CURL:
Rw 1: With medium thyme, ch 12, 2 sc in second ch from hook and in each ch across.  (24)
Finish off leaving a long tail.  Sew CURL to base of LEAF.

PINEAPPLE:
BODY:
Rd 1: With warm brown and G hook, 8 sc in magic ring.  (8)
Rd 2: 2 sc in each sc around.  (16)
Rd 3: (sc in next sc, 2 sc in next sc) around.  (24)
Rd 4: (sc in next 2 sc, 2 sc in next sc) around.  (32)
Rd 5: (sc in next 3 sc, 2 sc in next sc) around.  (40)
Rd 6: slip st in next sc, working in back loops only, ch 1, (sc in next sc, dc in next sc) around, slip st in first sc.  (40)
Rd 7: Ch 2, (dc in next st, sc in next st) around, slip st in first st.  (40)
Rd 8: Ch 1, (sc in next st, dc in next st) around, slip st in first st.  (40)
Rd 9: Ch 2, (dc in next st, sc in next st) around, slip st in first st.  (40)
Rd 10: Ch 1, (sc in next st, dc in next st) around, slip st in first st.  (40)
Rd 11: Ch 2, (dc in next st, sc in next st) around, slip st in first st.  (40)
Rd 12: Ch 1, (sc in next st, dc in next st) around, slip st in first st.  (40)
Rd 13: Ch 2, [(dc in next st, sc in next st) 4 times, dc2tog, (sc in next st, dc in next st) 4 times, sc2tog] twice, slip st in first st.  (36)
Rd 14: Ch 1, (sc in next st, dc in next st) around, slip st in first st.  (36)
Rd 15: Ch 2, [(dc in next st, sc in next st) 3 times, dc in next st, sc2tog] 4 times, slip st in first st.  (32)
Rd 16: Ch 1, [(sc in next st, dc in next st) 3 times, sc2tog] 4 times, slip st in first st.  (28)
Rd 17: Ch 2, [(dc in next st, sc in next st) twice, dc in next st, sc2tog] 4 times, slip st in first st.  (24)
Rd 18: Working in back loops only, ch 1, (sc in next 4 sc, sc2tog) around, slip st in first st.  (20)
Rd 19: Working in back loops only, ch 1, (sc in next 3 sc, sc2tog) around, slip st in first st.  (16)
STUFF PINEAPPLE FIRMLY.
Rd 20: Working in back loops only, ch 1, (sc in next 2 sc, sc2tog) around, slip st in first st.  (12)
Rd 21: Working in back loops only, ch 1, (sc in next sc, sc2tog) around, slip st in first st.  (8)
Finish off leaving a long tail.  Weave tail through sc of Rd 21, pull tightly, and secure.  Weave in ends.

LEAVES (MAKE 4 SETS):
FIRST SET OF LEAVES (MAKE 3):
Rw 1: Working in free loops left from Rd 20, attach paddy green with sc in any sc, sc in next 3 sc leaving remaining sc unworked.  (4)
Rws 2-6: Ch 1, turn; sc in each sc across.  (4)
Rw 7: Ch 1, turn; sc2tog across.  (2)
Rws 8-10: Ch 1, turn; sc in each sc across.  (2)
Rw 11: Ch 1, turn; sc2tog.  (1)
Finish off.  Weave in ends.
For remaining leaves, attach paddy green with sc in next unworked sc of Rd 20, follow instructions of first leaf.
SECOND SET OF LEAVES (MAKE 4):
Rw 1: Working in free loops left from Rd 19, attach paddy green with sc in any sc, sc in next 3 sc leaving remaining sc unworked.  (4)
Rws 2-5: Ch 1, turn; sc in each sc across.  (4)
Rw 6: Ch 1, turn; sc2tog across.  (2)
Rws 7-8: Ch 1, turn; sc in each sc across.  (2)
Rw 9: Ch 1, turn; sc2tog.  (1)
Finish off.  Weave in ends.
For remaining leaves, attach paddy green with sc in next unworked sc of Rd 19, follow instructions of first leaf.
THIRD SET OF LEAVES (MAKE 5):
Rw 1: Working in free loops left from Rd 18, attach paddy green with sc in any sc, sc in next 3 sc leaving remaining sc unworked.  (4)
Rws 2-4: Ch 1, turn; sc in each sc across.  (4)
Rw 5: Ch 1, turn; sc2tog across.  (2)
Rw 6: Ch 1, turn; sc in each sc across.  (2)
Rw 7: Ch 1, turn; sc2tog.  (1)
Finish off.  Weave in ends.
For remaining leaves, attach paddy green with sc in next unworked sc of Rd 18, follow instructions of first leaf.
FOURTH SET OF LEAVES (MAKE 6):
Rw 1: Working in free loops left from Rd 17, attach paddy green with sc in any sc, sc in next 3 sc leaving remaining sc unworked.  (4)
Rws 2-3: Ch 1, turn; sc in each sc across.  (4)
Rw 4: Ch 1, turn; sc2tog across.  (2)
Rw 5: Ch 1, turn; sc2tog.  (1)
Finish off.  Weave in ends.
For the remaining leaves, attach paddy green with sc in next unworked sc of Rd 17, follow instructions of first leaf.

BASKET:
Rd 1: With 2 strands of basket color held together and J hook, 6 sc in magic ring.  (6)
Rd 2: 2 sc in each sc around.  (12)
Rd 3: (sc in next sc, 2 sc in next sc) around.  (18)
Rd 4: (sc in next 2 sc, 2 sc in next sc) around.  (24)
Rd 5: (sc in next 3 sc, 2 sc in next sc) around.  (30)
Rd 6: (sc in next 4 sc, 2 sc in next sc) around.  (36)
Rd 7: working in front loops only, sc in each sc around.  (36)
Rd 8: Working in back loops of Rd 6, ch 1, (sc in next 5 sc, 2 sc in next sc) around.  (42)
Rd 9: (sc in next 6 sc, 2 sc in next sc) around.  (48)
Rd 10: (sc in next 7 sc, 2 sc in next sc) around.  (54)
Rd 11: (sc in next 8 sc, 2 sc in next sc) around.  (60)
Rds 12-19: sc in each sc around.  (60)
Rd 20: sc in next 5 sc, ch 11, skip next 3 sc, sc in next 27 sc, ch 11, skip next 3 sc, sc in next 22 sc.  (54)
Rd 21: sc in next 5 sc, 15 sc in next ch-11 sp, sc in next 27 sc, 15 sc in next ch-11 sp, sc in next 22 sc.  (84)
Finish off.  Weave in ends.  Roll top 3 rounds down.

This crochet pattern is an original pattern and is © by Christjan Bee (May 2016).  Please do not claim this pattern as your own.  If you wish to share this pattern, you may link to this pattern but please do not reprint/repost it on your site.  You may print and keep a copy for your own personal use but you may not sell or distribute it, or sell items made from this pattern.

Saturday, May 21, 2016

HEART PILLOW

This was a request from a co-worker of mine.  He wanted a small heart throw pillow with his wife’s name on it.  The picture above is of the side that does not have his wife’s name.  It is an easy pattern.

MATERIALS:
Worsted weight yarn:  Red and white
H crochet hook
Polyester Fiberfill
Tapestry needle

HEART (MAKE 2):
Rw 1: With red, ch 2, 2 sc in second ch from hook.  (2)
Rw 2: Ch 1, turn; 2 sc in each sc across.  (4)
Rw 3: Ch 1, turn; 2 sc in next sc, sc in next 2 sc, 2 sc in next sc.  (6)
Rw 4: Ch 1, turn; 2 sc in next sc, sc in next 4 sc, 2 sc in next sc.  (8)
Rw 5: Ch 1, turn; 2 sc in next sc, sc in next 6 sc, 2 sc in next sc.  (10)
Rw 6: Ch 1, turn; 2 sc in next sc, sc in next 8 sc, 2 sc in next sc.  (12)
Rw 7: Ch 1, turn; 2 sc in next sc, sc in next 10 sc, 2 sc in next sc.  (14)
Rw 8: Ch 1, turn; 2 sc in next sc, sc in next 12 sc, 2 sc in next sc.  (16)
Rw 9: Ch 1, turn; 2 sc in next sc, sc in next 14 sc, 2 sc in next sc.  (18)
Rw 10: Ch 1, turn; 2 sc in next sc, sc in next 16 sc, 2 sc in next sc.  (20)
Rw 11: Ch 1, turn; 2 sc in next sc, sc in next 18 sc, 2 sc in next sc.  (22)
Rw 12: Ch 1, turn; 2 sc in next sc, sc in next 20 sc, 2 sc in next sc.  (24)
Rw 13: Ch 1, turn; 2 sc in next sc, sc in next 22 sc, 2 sc in next sc.  (26)
Rw 14: Ch 1, turn; 2 sc in next sc, sc in next 24 sc, 2 sc in next sc.  (28)
Rw 15: Ch 1, turn; 2 sc in next sc, sc in next 26 sc, 2 sc in next sc.  (30)
Rw 16: Ch 1, turn; 2 sc in next sc, sc in next 28 sc, 2 sc in next sc.  (32)
Rws 17-18: Ch 1, turn; sc in each sc across.  (32)
Rw 19: Ch 1, turn; 2 sc in next sc, sc in next 15, 2 sc in next sc, sc in next 14 sc, 2 sc in next sc.  (35)
Rw 20-28: Ch 1, turn; sc in each sc across.  (35)
BUMP 1:
Rw 29: Ch 1, turn; sc2tog, sc in next 14 sc.  (15)
Rw 30: Ch 1, turn; sc in next 13 sc, sc2tog.  (14)
Rw 31: Ch 1, turn; sc2tog, sc in next 10 sc, sc2tog.  (12)
Rw 32: Ch 1, turn; sc2tog, sc in next 8 sc, sc2tog.  (10)
Rw 33: Ch 1, turn; sc2tog, sc in next 6 sc, sc2tog. (8)
Finish off.
BUMP 2:
Rw 29: Skip next 3 sc, attach red with slip st, ch 1, sc in next same sc as slip st, sc in next 13 sc, sc2tog.  (15)
Rw 30: Ch 1, turn; sc2tog, sc in next 13 sc.  (14)
Rw 31: Ch 1, turn; sc2tog, sc in next 10 sc, sc2tog.  (12)
Rw 32: Ch 1, turn; sc2tog, sc in next 8 sc, sc2tog.  (10)
Rw 33: Ch 1, turn; sc2tog, sc in next 6 sc, sc2tog.  (8)
Finish off.

BORDER:
Rd 1: With wrong side of FRONT and BACK together, with BACK facing you, and working through both thicknesses, attach white with slip st in side, ch 1, work 96 sc around working 3 sc at bottom point.  Join with slip st to first sc.  (96)
Rd 2: Ch 1, (sc in next sc, skip next sc, 5 dc in next sc, skip next sc) around, join with slip st to first sc.
Finish off.  Weave in ends.

This crochet pattern is an original pattern and is © by Christjan Bee (May 2016).  Please do not claim this pattern as your own.  If you wish to share this pattern, you may link to this pattern but please do not reprint/repost it on your site.  You may print and keep a copy for your own personal use but you may not sell or distribute it, or sell items made from this pattern.

Sunday, May 15, 2016

SWEET CANDY

My daughter asked me to design a series of crochet edibles.  This is the next set of items of the series.  This pattern can made with any two colors.  I made mine with yellow and red.

MATERIALS:
Worsted weight yarn:  Yellow and red.
E crochet hook
Polyester Fiberfill
Tapestry needle

SWEET CANDY:
Rw 1: With yellow, ch 18, sc in second ch from hook and in each ch across.  (17)
Rw 2: Ch 1, turn; sc in each sc across.  (17)  Change to red.
Rw 3: Ch 1, turn; sc in each sc across.  (17)  Change to yellow.
Rws 4-7: Ch 1, turn; sc in each sc across.  (17)  Change to red after Rw 7.
Rw 8: Ch 1, turn; sc in each sc across.  (17)  Change to yellow.
Rws 9-10: Ch 1, turn; sc in each sc across.  (17)  Change to red after Rw 10.
Rw 11: Ch 1, turn; sc in each sc across.  (17)  Change to yellow.
Rws 12-13: Ch 1, turn; sc in each sc across.  (17)  Change to red after Rw 13.
Rw 14: Ch 1, turn; sc in each sc across.  (17)  Change to yellow.
Rws 15-18: Ch 1, turn; sc in each sc across.  (17)  Change to red after Rw 18.
Rw 19: Ch 1, turn; sc in each sc across.  (17)  Change to yellow.
Rws 20-21: Ch 1, turn; sc in each sc across.  (17)
Finish off leaving a long tail.  Use tail to side of Rows together.  Weave in ends.
Weave yellow through sc of Rw 5, pull tightly and secure.  Add stuffing to center section of SWEET CANDY.  Weave yellow through sc of Rw 16, pull tightly and secure.
This crochet pattern is an original pattern and is © by Christjan Bee (May 2016).  Please do not claim this pattern as your own.  If you wish to share this pattern, you may link to this pattern but please do not reprint/repost it on your site.  You may print and keep a copy for your own personal use but you may not sell or distribute it, or sell items made from this pattern.

BREAKFAST TIME!

My daughter asked me to design a series of crochet edibles.  This is the next set of items of the series.  This pattern includes several breakfast items—eggs, bacon, pancakes and toast.

MATERIALS:
Worsted weight yarn:  Warm brown, buff, yellow, white, and burgundy.
E crochet hook
Polyester Fiberfill
Tapestry needle

EGG (MAKE 2):
EGG YOLK (MAKE 2):
Rd 1: With yellow, 8 sc in magic ring.  (8)
Rd 2: 2 sc in each sc around.  (16)
Rd 3: (sc in next sc, 2 sc in next sc) around.  (24)
Rds 4-6: sc in each sc around.  (24)
Finish off.  Weave in ends.

EGG WHITE (MAKE 2):
Rd 1: With white, 8 sc in magic ring.  (8)
Rd 2: 2 sc in each sc around.  (16)
Rd 3: (sc in next sc, 2 sc in next sc) around.  (24)
ADD STUFFING TO YOLK.
Rd 4: Holding EGG WHITE and EGG YOLK together and working through both thicknesses, (sc in next 2 sc, 2 sc in next sc) around.  (32)
Rd 5: (sc in next 3 sc, 2 sc in next sc) around.  (40)
Rd 6: (sc in next 4 sc, 2 sc in next sc) around.  (48)
Rd 7: (sc in next 5 sc, 2 sc in next sc) around.  (56)
Rd 8: (6 sts, 2 sts) around.  (64 total)  For Rd 8, use a combination of stitches (sc, hdc, and dc) at random to create uneven edge.  Finish off after Rd 8.  Weave in ends.

BACON (MAKE 2):
Rw 1: With burgundy, ch 25, sc in second ch from hook and in next 4 ch, 2 sc in next ch, sc in next 5 ch, sc2tog, sc in next 5 ch, 2 sc in next ch, sc in next 5 sc.  (25)
Rw 2: Ch 1, turn; sc in each sc across.  (25)  Change to buff.
Rw 3: Ch 1, turn; sc in each sc across.  (25)  Change to burgundy.
Rw 4: Ch 1, turn; sc in each sc across.  (25)  Change to buff.
Rw 5: Ch 1, turn; sc in each sc across.
Finish off.  Weave in ends.

PANCAKES (MAKE 2):
Rd 1: With warm brown, 8 sc in magic ring.  (8)
Rd 2: 2 sc in each sc around.  (16)
Rd 3: (sc in next sc, 2 sc in next sc) around.  (24)
Rd 4: (2 sc in next sc, sc in next 2 sc) around.  (32)
Rd 5: (sc in next 3 sc, 2 sc in next sc) around.  (40)
Rd 6: (2 sc in next sc, sc in next 4 sc) around.  (48)
Rd 7: (sc in next 5 sc, 2 sc in next sc) around.  (56)
Rd 8: (2 sc in next sc, sc in next 6 sc) around.  (64)
Rd 9: (sc in next 7 sc, 2 sc in next sc) around.  (72)  Finish off.
Rd 10: Rotate PANCAKE a few sc, attach buff with slip st, ch 1, (sc in next 8 sc, 2 sc in next sc) around.  (80)
Finish off.  Weave in ends.

TOAST (MAKE 2):
Rw 1: With buff, ch 16, sc in second ch from hook and in each ch across.  (15)
Rws 2-15: Ch 1, turn; sc in each sc across.  (15)
Rw 16: Ch 1, turn; skip next 3 sc, 7 tr in next sc, skip next sc, slip st in next sc, sc in next 2 sc, slip st in next sc, skip next sc, 7 tr in next sc, skip next 3 sc, slip st in next sc.
Finish off.  Weave in ends.  Attach warm brown, sc evenly around outer edge of TOAST with 2 sc in each bottom corner.  Weave in ends.

This crochet pattern is an original pattern and is © by Christjan Bee (May 2016).  Please do not claim this pattern as your own.  If you wish to share this pattern, you may link to this pattern but please do not reprint/repost it on your site.  You may print and keep a copy for your own personal use but you may not sell or distribute it, or sell items made from this pattern.

HAMBURGER

My daughter asked me to design a series of crochet edibles.  This is the next item of the series.  This is a pattern for a hamburger.  I included a pattern for cheese and bacon because my daughter likes cheese on her hamburgers.  You can garnish your hamburger the way you want

MATERIALS:
Worsted weight yarn:  Warm brown, red, spring green, yellow, buff, burgundy, and coffee brown
E crochet hook
Polyester Fiberfill
Tapestry needle

TOP BUN:
Rd 1: With warm brown, 10 sc in magic ring.  (10)
Rd 2: sc in next sc, 2 sc in next 9 sc.  (19)
Rd 3: sc in each sc around.  (19)
Rd 4: sc in next sc, (2 sc in next sc, sc in next sc) around.  (28)
Rd 5: sc in each sc around.  (28)
Rd 6: (2 sc in next sc, sc in next 2 sc) 9 times, sc in next sc.  (37)
Rd 7: sc in each sc around.  (37)
Rd 8: (sc in next 3 sc, 2 sc in next sc) 9 times, sc in next sc.  (46)
Rds 9-12: sc in each sc around.  (46)
Rd 13: (sc in next 3 sc, sc2tog) 9 times, sc in next sc.  (37)
Rd 14: (sc2tog, sc in next 2 sc) 9 times, sc in next sc.  (28)
Rd 15: sc in next sc, (sc2tog, sc in next sc) around.  (19)
Rd 16: (sc2tog) 9 times, sc in next sc.  (10)
Finish off leaving a long tail.  Add stuffing to achieve desired firm shape.  Weave tail through sc of Rd 16, pull tightly and secure.  Weave in ends.

BOTTOM BUN:
Rd 1: With warm  brown, 6 sc in magic ring.  (6)
Rd 2: 2 sc in each sc around.  (12)
Rd 3: (sc in next sc, 2 sc in next sc) around.  (18)
Rd 4: (2 sc in next sc, sc in next 2 sc) around.  (24)
Rd 5: (sc in next 3 sc, 2 sc in next sc) around.  (30)
Rd 6: (2 sc in next sc, sc in next 4 sc) around.  (36)
Rd 7: (sc in next 5 sc, 2 sc in next sc) around.  (42)
Rd 8: (sc in next 9 sc, 2 sc in next sc) twice, (sc in next 10 sc, 2 sc in next sc) twice.  (46)
Rds 9-12: sc in each sc around.  (46)
Rd 13: (sc in next 3 sc, sc2tog) 9 times, sc in next sc.  (37)
Rd 14: (sc2tog, sc in next 2 sc) 9 times, sc in next sc.  (28)
Rd 15: sc in next sc, (sc2tog, sc in next sc) around.  (19)
Rd 16: (sc2tog) 9 times, sc in next sc.  (10)
Finish off leaving a long tail.  Add stuffing to achieve desired firm shape.  Weave tail through sc of Rd 16, pull tightly and secure.  Weave in ends.

BURGER PATTY:
Rd 1: With coffee brown, 6 sc in magic ring.  (6)
Rd 2: 2 sc in each sc around.  (12)
Rd 3: (sc in next sc, 2 sc in next sc) around.  (18)
Rd 4: (2 sc in next sc, sc in next 2 sc) around.  (24)
Rd 5: (sc in next 3 sc, 2 sc in next sc) around.  (30)
Rd 6: (2 sc in next sc, sc in next 4 sc) around.  (36)
Rd 7: (sc in next 5 sc, 2 sc in next sc) around.  (42)
Rds 8-9: sc in each sc around.  (42)
Rd 11: (sc in next 7 sc, sc2tog) twice, (sc in next 6 sc, sc2tog) 3 times.  (37)
Rd 12: (sc2tog, sc in next 2 sc) 9 times, sc in next sc.  (28)
Rd 13: sc in next sc, (sc2tog, sc in next sc) around.  (19)
Rd 14: (sc2tog) 9 times, sc in next sc.  (10)
Finish off leaving a long tail.  Add stuffing to achieve desired firm shape.  Weave tail through sc of Rd 17, pull tightly and secure.  Weave in ends.

CHEESE:
Rw 1: With yellow, ch 16, sc in second ch from hook and in each ch across.  (15)
Rws 2-15: Ch 1, turn; sc in each sc across.  (15)
Finish off.  Weave in ends.

BACON (MAKE 2):
Rw 1: With burgundy, ch 25, sc in second ch from hook and in next 4 ch, 2 sc in next ch, sc in next 5 ch, sc2tog, sc in next 5 ch, 2 sc in next ch, sc in next 5 sc.  (25)
Rw 2: Ch 1, turn; sc in each sc across.  (25)  Change to buff.
Rw 3: Ch 1, turn; sc in each sc across.  (25)  Change to burgundy.
Rw 4: Ch 1, turn; sc in each sc across.  (25)  Change to buff.
Rw 5: Ch 1, turn; sc in each sc across.
Finish off.  Weave in ends.

LETTUCE:
Rd 1: With spring green, 6 sc in magic ring.  (6)
Rd 2: 2 sc in each sc around.  (12)
Rd 3: (sc in next sc, 2 sc in next sc) around.  (18)
Rd 4: (sc in next 2 sc, 2 sc in next sc) around.  (24)
Rd 5: (sc in next 3 sc, 2 sc in next sc) around.  (30)
Rd 6: (sc in next 4 sc, 2 sc in next sc) around.  (36)
Rd 7: (sc in next 5 sc, 2 sc in next sc) around.  (42)
Rd 8: (3 dc in next sc, slip st in next sc, sc in next sc, 4 dc in next sc, slip st in next sc, sc in next sc) around.
Finish off.  Weave in ends.

TOMATO (MAKE 3):
Rd 1: With red, 8 sc in magic ring.  (8)
Rd 2: 2 sc in each sc around.  (16)
Rd 3: (sc in next sc, 2 sc in next sc) around.  (24)

This crochet pattern is an original pattern and is © by Christjan Bee (May 2016).  Please do not claim this pattern as your own.  If you wish to share this pattern, you may link to this pattern but please do not reprint/repost it on your site.  You may print and keep a copy for your own personal use but you may not sell or distribute it, or sell items made from this pattern.

Saturday, May 14, 2016

HOT DOG

My daughter asked me to design a series of crochet edibles.  This is the next item of the series.  This is a pattern for a hot dog.  This hot dog is garnished with mustard, ketchup, and relish, which is my daughter’s favorite garnishes for her hot dogs.  This is the pattern for my daughter’s hot dog.

MATERIALS:
Worsted weight yarn:  Buff, carrot, cherry red, paddy green, and yellow
E crochet hook
Polyester fiberfill
Tapestry needle

BREAD ROLL (MAKE 2):
Rd 1: With buff, 6 sc in magic ring.  (6)
Rd 2: (sc in next 2 sc, 2 sc in next sc) around.  (8)
Rd 3: (sc in next sc, 2 sc in next sc) around.  (12)
Rd 4: (sc in next 5 sc, 2 sc in next sc) around.  (14)
Rd 5: (sc in next 6 sc, 2 sc in next sc) around.  (16)
Rd 6: (sc in next 7 sc, 2 sc in next sc) around.  (18)
Rds 7- 19: sc in each sc around.  (18)
Rd 20: (sc in next 7 sc, sc2tog) around.  (16)
Rd 21: (sc in next 6 sc, sc2tog) around.  (14)
Rd 22: (sc in next 5 sc, sc2tog) around.  (12)
BEGIN STUFFING BREAD ROLL FIRMLY.  CONTINUE STUFFING AS YOU GO ALONG.
Rd 23: (sc in next sc, sc2tog) around.  (8)
Rd 24: (sc in next 2 sc, sc2tog) around.  (6)
Finish off leaving a long tail.  Weave tail through sc of Rd 24, pull tight, and secure.  Weave in ends.  Sew two BREAD ROLL pieces together.

SAUSAGE:
Rd 1: With carrot, 7 sc in magic ring.  (7)
Rd 2: sc in next sc, 2 sc in next 6 sc.  (13)
Rds 3-23: sc in each sc around.  (13)
BEGIN STUFFING SAUSAGE FIRMLY.
Rd 24: sc in next sc, (sc2tog) 6 times.  (7)
Finish off leaving a long tail.  Weave tail through sc of Rd 24, pull tightly, and secure.  Sew SAUSAGE to BREAD ROLL.

MUSTARD:
With yellow, ch 60.  Finish off leaving a long tail.  Sew to HOT DOG using picture for placement.

KETCHUP:
With red, ch 60.  Finish off leaving a long tail.  Sew to HOT DOG using picture for placement.

RELISH:
Using paddy green, embroider RELISH using French knots in random places of HOT DOG.

This crochet pattern is an original pattern and is © by Christjan Bee (May 2016).  Please do not claim this pattern as your own.  If you wish to share this pattern, you may link to this pattern but please do not reprint/repost it on your site.  You may print and keep a copy for your own personal use but you may not sell or distribute it, or sell items made from this pattern.

Friday, May 13, 2016

RAINBOW

My wife saw mini rainbow pillow in a knitting pattern book.  She asked me to make it.  Unfortunately, I do not know how to knit.  So, I had to come up with a crochet pattern for one similar.  Here is the pattern that I came up with.

MATERIALS:
Worsted weight yarn:  Red, orange, yellow, paddy green, delft blue, royal blue, lavender.
E crochet hook
Polyester fiberfill
Tapestry needle

RAINBOW:
Rd 1: With lavender, ch 24, slip st in first ch to form circle, ch 1, (sc in next 3 ch, 2 sc in next ch) around, join with slip st in first ch changing to royal blue.  (30)
Rd 2: Ch 1, (sc in next 4 sc, 2 sc in next sc) around, join with slip st in first sc changing to delft blue.  (36)
Rd 3: Ch 1, (sc in next 5 sc, 2 sc in next sc) around, join with slip st in first sc changing to paddy green.  (42)
Rd 4: Ch 1, (sc in next 6 sc, 2 sc in next sc) around, join with slip st in first sc changing to yellow.  (48)
Rd 5: Ch 1, (sc in next 7 sc, 2 sc in next sc) around, join with slip st in first sc changing to orange.  (54)
Rd 6: Ch 1, (sc in next 8 sc, 2 sc in next sc) around, join with slip st in first sc changing to red.  (60)
Rd 7: Ch 1, (sc in next 9 sc, 2 sc in next sc) around, join with slip st in first.  (66)
Finish off leaving a long tail.  Fold RAINBOW in half.  Sew lavender edge together.  Begin sewing red edge together.  Before closing, add stuffing to RAINBOW.  Weave in ends.

This crochet pattern is an original pattern and is © by Christjan Bee (May 2016).  Please do not claim this pattern as your own.  If you wish to share this pattern, you may link to this pattern but please do not reprint/repost it on your site.  You may print and keep a copy for your own personal use but you may not sell or distribute it, or sell items made from this pattern.

PIZZA SLICE

My daughter asked me to design a series of crochet edibles.  This is the first of the series.  This is a pattern for pizza.  I made it to look like pepperoni and pineapple pizza, which is my daughter’s favorite type.  Here is the pattern.

MATERIALS:
Worsted weight yarn:  Buff, cherry red, burgundy, white, and yellow
E crochet hook
Polyester fiberfill
Tapestry needle
Glue

FILLING:
Rw 1: With cherry red, ch 25, sc in second ch from hook and in each ch across.  (24)
Rw 2: Ch 1, turn; sc in each sc across.  (24)
Rw 3: Ch 1, turn; sc in next 5 sc, sc2tog, sc in next 10 sc, sc2tog, sc in next 5 sc.  (22)
Rw 4: Ch 1, turn; sc in each sc across.  (22)
Rw 5: Ch 1, turn; sc in next 5 sc, sc2tog, sc in next 8 sc, sc2tog, sc in next 5 sc.  (20)
Rw 6: Ch 1, turn; sc in each sc across.  (20)
Rw 7: Ch 1, turn; sc in next 5 sc, sc2tog, sc in next 6 sc, sc2tog, sc in next 5 sc.  (18)
Rw 8: Ch 1, turn; sc in each sc across.  (18)
Rw 9: Ch 1, turn; sc in next 5 sc, sc2tog, sc in next 4 sc, sc2tog, sc in next 5 sc.  (16)
Rw 10: Ch 1, turn; sc in each sc across.  (16)
Rw 11: Ch 1, turn; sc in next 4 sc, sc2tog, sc in next 4 sc, sc2tog, sc in next 4 sc.  (14)
Rw 12: Ch 1, turn; sc in each sc across.  (14)
Rw 13: Ch 1, turn; sc in next 3 sc, sc2tog, sc in next 4 sc, sc2tog, sc in next 3 sc.  (12)
Rw 14: Ch 1, turn; sc in each sc across.  (12)
Rw 15: Ch 1, turn; sc in next 2 sc, sc2tog, sc in next 4 sc, sc2tog, sc in next 2 sc.  (10)
Rw 16: Ch 1, turn; sc in each sc across.  (10)
Rw 17: Ch 1, turn; sc in next 2 sc, sc2tog, sc in next 2 sc, sc2tog, sc in next 2 sc.  (8)
Rw 18: Ch 1, turn; sc in each sc across.  (8)
Rw 19: Ch 1, turn; sc in next 2 sc, (sc2tog) twice, sc in next 2 sc.  (6)
Rw 20: Ch 1, turn; sc in each sc across.  (6)
Rw 21: Ch 1, turn; sc in next sc, (sc2tog) twice, sc in next sc.  (4)
Rw 22: Ch 1, turn; sc in each sc across.  (4)
Finish off leaving a long tail.  Weave tail through sc of Rd 22, pull tight, and secure.  Weave in ends.

CRUST:
Rw 1: With buff, ch 25, sc in second ch from hook and in each ch across.  (24)
Rws 2-3: Ch 1, turn; sc in each sc across.  (24)
Rw 4: Ch 1, turn; sc in next 5 sc, (2 sc in next sc, sc in next 3 sc) 5 times.  (29)
Rws 5-9: Ch 1, turn; sc in each sc across.  (29)
Rw 10: Ch 1, turn; sc in next 5 sc, (sc2tog, sc in next 3 sc) 5 times.  (24)
Rws 11-15: Ch 1, turn; sc in each sc across.  (24)
Rw 16: Fold piece in half, working through Rw 15 & Rw 1, ch 1, turn; sc in each sc across.  (24)
Rw 17: Ch 1, turn; sc in each sc across.  (24)
Rw 18: Ch 1, turn; sc in next 5 sc, sc2tog, sc in next 10 sc, sc2tog, sc in next 5 sc.  (22)
Rw 19: Ch 1, turn; sc in each sc across.  (22)
Rw 20: Ch 1, turn; sc in next 5 sc, sc2tog, sc in next 8 sc, sc2tog, sc in next 5 sc.  (20)
Rw 21: Ch 1, turn; sc in each sc across.  (20)
Rw 22: Ch 1, turn; sc in next 5 sc, sc2tog, sc in next 6 sc, sc2tog, sc in next 5 sc.  (18)
Rw 23: Ch 1, turn; sc in each sc across.  (18)
Rw 24: Ch 1, turn; sc in next 5 sc, sc2tog, sc in next 4 sc, sc2tog, sc in next 5 sc.  (16)
Rw 25: Ch 1, turn; sc in each sc across.  (16)
Rw 26: Ch 1, turn; sc in next 4 sc, sc2tog, sc in next 4 sc, sc2tog, sc in next 4 sc.  (14)
Rw 27: Ch 1, turn; sc in each sc across.  (14)
Rw 28: Ch 1, turn; sc in next 3 sc, sc2tog, sc in next 4 sc, sc2tog, sc in next 3 sc.  (12)
Rw 29: Ch 1, turn; sc in each sc across.  (12)
Rw 30: Ch 1, turn; sc in next 2 sc, sc2tog, sc in next 4 sc, sc2tog, sc in next 2 sc.  (10)
Rw 31: Ch 1, turn; sc in each sc across.  (10)
Rw 32: Ch 1, turn; sc in next 2 sc, sc2tog, sc in next 2 sc, sc2tog, sc in next 2 sc.  (8)
Rw 33: Ch 1, turn; sc in each sc across.  (8)
Rw 34: Ch 1, turn; sc in next 2 sc, (sc2tog) twice, sc in next 2 sc.  (6)
Rw 35: Ch 1, turn; sc in each sc across.  (6)
Rw 36: Ch 1, turn; sc in next sc, (sc2tog) twice, sc in next sc.  (4)
Rw 37: Ch 1, turn; sc in each sc across.  (4)
Finish off leaving a long tail.  Weave tail through sc of Rd 37, pull tight, and secure.  Weave in ends.
Sew one end of CRUST closed.  Before sewing second end closed, stuff CRUST.

PEPPERONI (MAKE 2):
Rd 1: With burgundy, 8 sc in magic ring.  (8)
Rd 2: 2 sc in each sc around.  (16)
Rd 3: (sc in next sc, 2 sc in next sc) around.  (24)
Finish off.  Sew PEPPERONI to FILLING.

PINEAPPLE PIECES (MAKE 6):
Rw 1: With yellow, ch 6, sc in second ch from hook and in each ch across.  (5)
Finish off.  Sew PINEAPPLE PIECES to FILLING randomly.

CHEESE:
Using white, embroider CHEESE using straight stitches.

ASSEMBLY:
Place FILLING on right side of CRUST and glue FILLING to CRUST.

This crochet pattern is an original pattern and is © by Christjan Bee (May 2016).  Please do not claim this pattern as your own.  If you wish to share this pattern, you may link to this pattern but please do not reprint/repost it on your site.  You may print and keep a copy for your own personal use but you may not sell or distribute it, or sell items made from this pattern.

LITTLE FOX

My daughter saw “100 Little Knitted Projects” by Sarah Keen at the library.  She fell in love with several of the patterns in the book.  The problem with the patterns was they were knitted.  I do not know how to knit.  I pointed this out to my wife when she brought me the book.  I am sure that most parents know that when a 5 year old looks at you with their eyes, you cannot say no to them.  I had to come up with something.  I used the picture in the book to design a crocheted version.  Here is the pattern.

MATERIALS:
Worsted weight yarn:  Carrot, white, and black.
F crochet hook
Polyester fiberfill
Tapestry needle

BODY:
Rd 1: With carrot, 9 sc in magic ring.  (9)
Rd 2: 2 sc in each sc around.  (18)
Rd 3: (sc in next sc, 2 sc in next sc) 3 times, (sc in next 2 sc, 2 sc in next sc) 4 times.  (25)
Rd 4: sc in each sc around.  (25)
Rd 5: Slip st in next sc, ch 1, sc in same sc as slip st, sc in next 8 sc, change to white, sc in next 8 sc, change to carrot, sc in next 8 sc, join with slip st in first sc.  (25)
Rd 6: Ch 1, turn; sc in next 8 sc, change to white, sc in next 8 sc, change to carrot, sc in next 9 sc, join.  (25)
Rd 7: Ch 1, turn; sc in next 9 sc, change to white, sc in next 8 sc, change to carrot, sc in next 8 sc, join.  (25)
Rd 8: Ch 1, turn; sc in next 8 sc, change to white, sc in next 8 sc, change to carrot, sc in next 9 sc, join.  (25)
Rd 9: Ch 1, turn; sc in next 9 sc, change to white, sc in next 8 sc, change to carrot, sc in next 8 sc, join.  (25)
Rd 10: Ch 1, turn; sc in next 8 sc, change to white, sc in next 8 sc, change to carrot, sc in next 9 sc, join.  (25)
Rd 11: Ch 1, turn; sc in next 9 sc, change to white, sc in next 8 sc, change to carrot, sc in next 8 sc, join.  (25)
Rd 12: Ch 1, turn; sc in next 8 sc, change to white, sc in next 8 sc, change to carrot, sc in next 9 sc, join.  (25)
Rd 13: Ch 1, turn; sc in next 9 sc, change to white, sc in next 8 sc, change to carrot, sc in next 8 sc, join.  (25)
Rd 14: Ch 1, turn; sc in next 8 sc, change to white, sc in next 8 sc, change to carrot, sc in next 9 sc, join.  (25)
Rd 15: Ch 1, turn; sc in next 9 sc, change to white, sc in next 8 sc, change to carrot, sc in next 8 sc, join.  (25)
Rd 16: Ch 1, turn; sc in next 8 sc, change to white, sc in next 8 sc, change to carrot, sc in next 9 sc, join.  (25)
Rd 17: Ch 1, turn; sc in next 9 sc, change to white, sc in next 8 sc, change to carrot, sc in next 8 sc, join.  (25)
Rd 18: Ch 1, turn; sc in next 8 sc, change to white, sc in next 8 sc, change to carrot, sc in next 9 sc, join.  (25)
Rd 19: Ch 1, turn; sc in next 9 sc, change to white, sc in next 8 sc, change to carrot, sc in next 8 sc, join.  (25)
Rd 20: Ch 1, turn; sc in next sc, (sc2tog) twice, sc in next sc, sc2tog, change to white, sc2tog, sc in next sc, (sc2tog) twice, sc in next sc, change to carrot, (sc2tog) twice, sc in next sc, (sc2tog) twice, join.  (15)
BEGIN STUFFING BODY AND HEAD FIRMLY
Rd 21: Ch 1, turn; (sc2tog) twice, sc in next sc, change to white, (sc2tog) twice, sc in next sc, change to carrot, (sc2tog) twice, sc in next sc, join.  (9)
Finish off leaving a long tail.  Weave tail through sc of Rd 21, pull tight, and secure.  Weave in ends.

HEAD:
Rd 1: With black, 7 sc in magic ring.  (7)
Rd 2: sc in each sc around.  (7)
Rd 3: Slip st in next sc changing to white, ch 1, sc in same sc as slip st, sc in next sc, change to carrot, sc in next 3 sc, change to white, sc in next 2 sc, join.  (7)
Rds 4-5: Ch 1, turn; sc in next 2 sc, change to carrot, sc in next 3 sc, change to white, sc in next 2 sc, join.  (7)
Rd 6: Ch 1, turn; 2 sc in next sc, sc in next sc, change to carrot, 2 sc in next sc, sc in next sc, 2 sc in next sc, change to white, sc in next sc, 2 sc in next sc, join.  (11)
Rd 7: Ch 1, turn; sc in next 3 sc, change to carrot, sc in next 5 sc, change to white, sc in next 3 sc, join.  (11)
Rd 8: Ch 1, turn; 2 sc in next sc, sc in next sc, 2 sc in next sc, change to carrot, sc in next 5 sc, change to white, 2 sc in next sc, sc in next sc, 2 sc in next sc, join.  (15)
Rd 9: Ch 1, turn; sc in next 5 sc, change to carrot, sc in next 5 sc, change to white, sc in next 5 sc, join.  (15)
Rd 10: Ch 1, turn; 2 sc in next sc, (sc in next sc, 2 sc in next sc) twice, change to carrot, 2 sc in next 2 sc, sc in next sc, 2 sc in next 2 sc, change to white, 2 sc in next sc, (sc in next sc, 2 sc in next sc) twice, join.  (25)
Rd 11: Ch 1, turn; sc in next 8 sc, change to carrot, sc in next 9 sc, change to white, sc in next 8 sc, join changing to carrot.  (25)
Rd 12: Ch 1, sc in each sc around.  (25)
Rds 13-15: sc in each sc around.  (25)
Rd 16: sc in next sc, (sc2tog, sc in next 2 sc) 6 times.  (19)
Rd 17: sc in each sc around.  (19)
BEGIN STUFFING HEAD AT THIS POINT.  CONTINUE STUFFING AS YOU GO ALONG.
Rd 18: sc in next sc, (sc2tog, sc in next sc) 6 times.  (13)
Rd 19: sc in next sc, (sc2tog) 6 times.  (7)
Finish off leaving a long tail.  Weave tail through sc of Rd 19, pull tight, and secure.  Sew HEAD to BODY.

LEGS (MAKE 2):
Rd 1: With carrot, 5 sc in magic ring.  (5)
Rd 2: 2 sc in each sc around.  (10)
Rd 3: (sc in next sc, 2 sc in next sc) 4 times, sc in next 2 sc.  (14)
Rds 4-6: sc in each sc around.  (14)
BEGIN STUFFING ARMS AT THIS POINT.  CONTINUE STUFFING AS YOU GO ALONG.
Rd 7: sc2tog around.  (7)
Finish off leaving a long tail.  Weave tail through sc of Rd 7, pull tight, and secure.  Sew LEGS to BODY.

ARMS (MAKE 2):
Rd 1: With carrot, 7 sc in magic ring.  (7)
Rd 2: sc in each sc around.  (7)
Rd 3: sc in next sc, 2 sc in next sc, sc in next 3 sc, 2 sc in next sc, sc in next sc.  (9)
Rds 4-8: sc in each sc around.  (9)
BEGIN STUFFING ARMS AT THIS POINT.  CONTINUE STUFFING AS YOU GO ALONG.
Rd 9: (sc2tog, sc in next 2 sc) 3 times.  (6)
Finish off leaving a long tail.  Flatten open end, sew ARMS to BODY.

EARS (MAKE 2):
Rd 1: With carrot, 5 sc in magic ring.  (5)
Rd 2: sc in next sc, (2 sc in next sc, sc in next sc) twice.  (7)
Rds 3-4: sc in each sc around.  (7)
Finish off leaving a long tail.  Flatten EARS, sew EARS to HEAD.

TAIL:
Rd 1: With white, 7 sc in magic ring.  (7)
Rd 2: sc in next sc, (2 sc in next sc, sc in next sc) 3 times.  (10)
Rds 3-5: sc in each sc around.  (10)  Change to carrot.
Rds 6-8: sc in each sc around.  (10)
Rd 9: (sc in next 3 sc, sc2tog) around.  (8)
Rds 10-14: sc in each sc around.  (8)
Finish off leaving a long tail.  Add any stuffing needed to achieve desired shape.  Sew TAIL to BODY.

This crochet pattern is an original pattern and is © by Christjan Bee (May 2016).  Please do not claim this pattern as your own.  If you wish to share this pattern, you may link to this pattern but please do not reprint/repost it on your site.  You may print and keep a copy for your own personal use but you may not sell or distribute it, or sell items made from this pattern.

Monday, May 9, 2016

ROSEBUD

My wife recently said a knitted rosebud in a book.  She asked if I could make her one.  I, unfortunately, do not know how to knit.  So, I had to design one that I could crochet.  Here is the pattern that I came up with.

MATERIALS:
Worsted weight yarn:  Red and hunter green
E crochet hooks
Tapestry needle
Glue
Chenille stem

ROSEBUD:
Rw 1: With red, ch 31, sc in second ch from hook and in each ch across.  (30)
Rws 2-5: Ch 1, turn; sc in each sc across.  (30)
Finish off. Weave in ends.  Add some glue and roll into a bud.

GREEN ROSEBUD BOTTOM:
Rd 1: With hunter green and in working in bottom of rolled ROSEBUD, attach hunter green with slip st, ch 1, evenly sc 8 times around bottom of ROSEBUD.  (8)
Rd 2: (sc2tog) 4 times.  (4)
Finish off leaving a long tail.

STEM:
Rw 1: With hunter green, ch 36, sc in second ch from hook and each ch across.  (35)
Rws 2-4: Ch 1, turn; sc in each sc across.  (35)
Finish off leaving a long tail.  Using tail, sew seam closed.  Insert chenille stem and sew bottom of STEM closed.  Weave in end.  Using tail on GREEN ROSEBUD BOTTOM, sew STEM to GREEBN ROSEBUD BOTTOM.

LEAVES (MAKE 2):
Rw 1: With hunter green, ch 2, 2 sc in second ch from hook.  (2)
Rw 2: Ch 1, turn; 2 sc in each sc across.  (4)
Rw 3: Ch 1, turn; 2 sc in next sc, sc in next 2 sc, 2 sc in next sc.  (6)
Rws 4-7: Ch 1, turn; sc in each sc across.  (6)
Rw 8: Ch 1, turn; sc2tog, sc in next 2 sc, sc2tog.  (4)
Rw 9: Ch 1, turn; (sc2tog) twice.  (2)
Rw 10: Ch 1, turn; sc2tog.  (1)
Finish off leaving a long tail.  Sew LEAVES to STEM.

This crochet pattern is an original pattern and is © by Christjan Bee (May 2016).  Please do not claim this pattern as your own.  If you wish to share this pattern, you may link to this pattern but please do not reprint/repost it on your site.  You may print and keep a copy for your own personal use but you may not sell or distribute it, or sell items made from this pattern.

PTERODACTYL

The security guard at the local bus terminal asked me to make a Pterodactyl for her.  This is the pattern that I designed for her.  The Pterodactyl could be made with any color.  I made this one using aqua because that is the color that the security guard asked me to make it.

MATERIALS:
Worsted weight yarn:  Body color (Turqua) and orange
F crochet hook
Polyester fiberfill
Tapestry needle
1 set of 12mm brown safety eyes

BODY:
Rd 1: With body color, 8 sc in magic ring.  (8)
Rd 2: 2 sc in each sc around.  (16)
Rd 3: (sc in next sc, 2 sc in next sc) around.  (24)
Rd 4: (sc in next 2 sc, 2 sc in next sc) around.  (32)
Rd 5: (sc in next 3 sc, 2 sc in next sc) around.  (40)
Rd 6: (sc in next 4 sc, 2 sc in next sc) around.  (48)
Rds 7-12: sc in each sc around.  (48)
Rd 13: (sc in next 6 sc, sc2tog) around.  (42)
Rd 14: sc in each sc around.  (42)
Rd 15: (sc in next 5 sc, sc2tog) around.  (36)
Rd 16: sc in each sc around. (36)
Rd 17: (sc in next 4 sc, sc2tog) around.  (30)
Rd 18: sc in each sc around.  (30)
STUFF BODY FIRMLY.  CONTINUE ADDING STUFFING AS NEEDED.
Rd 19: (sc in next 3 sc, sc2tog) around.  (24)
Rds 20-21: sc in each sc around.  (24)
Rd 22: (sc in next 2 sc, sc2tog) around.  (18)
Rd 23-24: sc in each sc around.  (18)
Rd 25: (sc in next sc, sc2tog) around.  (12)
Rds 26-27: sc in each sc around.  (12)
Rd 28: sc2tog around.  (6)
Finish off leaving a long tail.  Weave tail through sc of Rd 28, pull tight, and secure.  Weave in ends.

HEAD:
Rd 1: With orange, 6 sc in magic ring.  (6)
Rd 2: (sc in next 2 sc, 2 sc in next sc) around.  (8)
Rd 3: sc in each sc around.  (8)
Rd 4: (sc in next 3 sc, 2 sc in next sc) around.  (10)
Rd 5: sc in each sc around.  (10)
Rd 6: (sc in next 4 sc, 2 sc in next sc) around.  (12)
Rd 7: sc in each sc around.  (12)
Rd 8: (sc in next 5 sc, 2 sc in next sc) around.  (14)
Rd 9: sc in each sc around. (14)
Rd 10: (sc in next 6 sc, 2 sc in next sc) around.  (16)
Rd 11: (sc in next 7 sc, 2 sc in next sc) around.  (18)
Rd 12: (sc in next 2 sc, 2 sc in next sc) around.  (24)
Rd 13: (sc in next 3 sc, 2 sc in next sc) around.  (30)  Change to Body color
Rd 14: Working in back loops only, (sc in next 4 sc, 2 sc in next sc) around.  (36)
Rd 15: (sc in next 5 sc, 2 sc in next sc) around.  (42)
Rds 16-21: sc in each sc around.  (42)
Rd 22: (sc in next 5 sc, sc2tog) around.  (36)
Rd 23: (sc in next 4 sc, sc2tog) around.  (30)
INSERT SAFETY EYES BETWEEN RDS 18-AND 19 WITH 14 SC BETWEEN EACH EYE.  BEGIN STUFFING HEAD FIRMLY.  CONTINUE STUFFING AS YOU GO ALONG.
Rd 24: (sc in next 3 sc, sc2tog) around.  (24)
Rd 25: (sc in next 2 sc, sc2tog) around.  (18)
Rds 26-28: sc in each sc around.  (18)
Rd 29: (sc in next 7 sc, sc2tog) around.  (16)
Rds 30-31: sc in each sc around.  (16)
Rd 32: (sc in next 6 sc, sc2tog) around.  (14)
Rds 33-34: sc in each sc around.  (14)
Rd 35: (sc in next 5 sc, sc2tog) around.  (12)
Rd 36: sc2tog around.  (6)
Finish off leaving a long tail.  Weave tail through sc of Rd 36, pull tight, and secure.  Weave in ends.  Sew HEAD to BODY.

LEGS (MAKE 2):
Rd 1: With orange, 8 sc in magic ring.  (8)
Rd 2: 2 sc in each sc around.  (16)
Rd 3: (sc in next sc, 2 sc in next sc) around.  (24)
Rd 4: (sc in next 2 sc, 2 sc in next sc) around.  (32)
Rds 5-6: sc in each sc around.  (32)
Rd 7: sc in next 10 sc, (sc2tog) 6 times, sc in next 10 sc.  (26)
Rd 8: sc in next 7 sc, (sc2tog) 6 times, sc in next 7 sc.  (20)
Rd 9: sc in next 6 sc, (sc2tog) 4 times, sc in next 6 sc.  (16)
Rd 10: sc in next 4 sc, (sc2tog) 4 times, sc in next 4 sc.  (12)
Rds 11-14: sc in each sc around.  (12)  Change to Body color after Rd 14.
Rds 15-16: sc in each sc around.  (12)
Rd 17: (sc in next 2 sc, 2 sc in next sc) around.  (16)
Rds 18-20: sc in each sc around.  (16)
Rd 21: (sc in next 2 sc, sc2tog) around.  (12)
Rd 22: sc2tog around.  (6)
Finish off leaving a long tail.  Sew LEGS to BODY.

TOE SHAPING :
To shape toes, thread yarn needle with cut ends of a doubled strand of BODY color yarn.  Using photo as a guide for stitch placement, insert needle through sole at first toe position and go straight through foot and out instep, pulling yarn through until loop protrudes from foot.  Bring yarn over top of foot to form toes and insert needle through loop; pull tightly.  Insert needle back through foot on outside of loop to secure and bring needle out at second toe on sole.  Bring thread over foot and insert needle through instep and go straight through foot and out sole at same point; pull tightly.  Take a couple of very small stitches to secure; insert needle inside the foot and push it out the bottom so the yarn does not show; cut the end close to the foot.  Use top of needle to pull stuffing into toe areas and shape foot.

WINGS (MAKE 2):
Rd 1: With Body color, 8 sc in magic ring.  (8)
Rds 2-6: sc in each sc around.  (8)
Rd 7: (sc in next 3 sc, 2 sc in next sc) around.  (10)
Rd 8: (sc in next 4 sc, 2 sc in next sc) around.  (12)
Rd 9: (sc in next 5 sc, 2 sc in next sc) around.  (14)
Rd 10: (sc in next 6 sc, 2 sc in next sc) around.  (16)
Rd 11: (sc in next 7 sc, 2 sc in next sc) around.  (18)
Rd 12: (sc in next 8 sc, 2 sc in next sc) around.  (20)
Rd 13: (sc in next 9 sc, 2 sc in next sc) around.  (22)
Rd 14: (sc in next 10 sc, 2 sc in next sc) around.  (24)
Rds 15-22: sc in each sc around.  (24)
Finish off leaving a long tail.  Flatten and do not stuff.  Sew WINGS to BODY.

HANDS (MAKE 2):
Rd 1: With orange, 6 sc in magic ring.  (6)
Rd 2: (slip st in next sc, ch 3, sc in second ch from hook and in next sc, slip st in next sc of Rd 1) around.  
Finish off leaving a long tail.  Sew HANDS to WINGS.

This crochet pattern is an original pattern and is © by Christjan Bee (May 2016).  Please do not claim this pattern as your own.  If you wish to share this pattern, you may link to this pattern but please do not reprint/repost it on your site.  You may print and keep a copy for your own personal use but you may not sell or distribute it, or sell items made from this pattern.