Sunday, September 30, 2018

TOGEPI

This is next on the LONG “To Do” list that my daughter gave to me at Christmas time.  Togepi, from the moment he was introduced, has been a fan favorite.  This pattern includes the color lists for both Togepi and Shiny Togepi.

MATERIALS:
Worsted Weight Yarn (Shiny color substitute in parenthesis):  White, red (blue), blue (red), buff (off-white), black, passion pink, and white.
E crochet hook
Polyester fiberfill
Yarn Needle

CROWN POINTS (MAKE 5):
Rd 1: With buff, 6 sc in magic ring.  (6)
Rd 2: (sc in next 2 sc, 2 sc in next sc) around.  (8)
Rd 3: (sc in next 3 sc, 2 sc in next sc) around.  (10)
Rd 4: (sc in next 4 sc, 2 sc in next sc) around.  (12)
Rd 5: (sc in next 5 sc, 2 sc in next sc) around.  (14)
Rd 6: (sc in next 6 sc, 2 sc in next sc) around.  (16)
Rd 7: (sc in next 7 sc, 2 sc in next sc) around.  (18)
Rd 8: (sc in next 8 sc, 2 sc in next sc) around.  (20)
Finish off.  Weave in ends.

BODY:
Rd 1: With white, 6 sc in magic ring.  (6)
Rd 2: 2 sc in each sc around.  (12)
Rd 3: (sc in next sc, 2 sc in next sc) around.  (18)
Rd 4: (sc in next 2 sc, 2 sc in next sc) around.  (24)
Rd 5: (sc in next 3 sc, 2 sc in next sc) around.  (30)
Rd 6: (sc in next 4 sc, 2 sc in next sc) around.  (36)
Rd 7: (sc in next 5 sc, 2 sc in next sc) around.  (42)
Rd 8: (sc in next 6 sc, 2 sc in next sc) around.  (48)
Rd 9: (sc in next 7 sc, 2 sc in next sc) around.  (54)
Rd 10: (sc in next 8 sc, 2 sc in next sc) around.  (60)
Rd 11: (sc in next 9 sc, 2 sc in next sc) around.  (66)
Rd 12: sc in each sc around.  (66)
Rd 13: (sc in next 10 sc, 2 sc in next sc) around.  (72)
Rd 14: (sc in next 23 sc, 2 sc in next sc) around.  (75)
Rds 15-21: sc in each sc around.  (75)
Rd 22: (sc in next 23 sc, sc2tog) around.  (72)
Rd 23: (sc in next 10 sc, sc2tog) around.  (66)
Rd 24: (sc in next 9 sc, sc2tog) around.  (60)
Rd 25: Working in front loops only, slip st in next sc, sc in next sc, hdc in next sc, dc in next sc, (dc, ch 1, tr, ch 1, dc) in next sc, hdc in next sc, sc in next sc, slip st in next sc, sc in next sc, hdc in next sc, dc in next sc, (dc, ch 1, tr, ch 1, dc) in next sc, dc in next sc, hdc in next sc, sc in next sc, slip st in next sc, sc in next sc, hdc in next sc, dc in next sc, (dc, ch 1, tr, ch 1, dc) in next sc, hdc in next sc, sc in next sc, slip st in next sc, hdc in next sc, dc in next sc, ch 1, slip st in ch, dc in next sc, (dc, ch 1, slip st in ch, dc) in next sc, dc in next sc, ch 1, slip st in ch, dc in next sc, hdc in next sc, (slip st in next sc, sc in next sc, hdc in next sc, dc in next sc, (dc, ch 1, tr, ch 1, dc) in next sc, hdc in next sc, sc in next sc, slip st in next sc, sc in next sc, hdc in next sc, dc in next sc, (dc, ch 1, tr, ch 1, dc) in next sc, dc in next sc, hdc in next sc, sc in next sc) twice.
Finish off.  Weave in ends.

HEAD:
Rd 1: Working in back loops of Rd 24 of BODY, attach buff, ch 1, sc in each sc around.  (60)
Rds 2-3: sc in each sc around.  (60)
Rd 4: (sc in next 10 sc, sc2tog) around.  (55)
Rd 5: sc in each sc around.  (55)
Rd 6: (sc in next 9 sc, sc2tog) around.  (50)
Rd 7: sc in each sc around.  (50)
Rd 8: (holding next sc on HEAD and first sc on CROWN POINTS together and working through both thicknesses, sc in next 10 sc) 5 times.  (50)
Rd 9: Working in sc of CROWN POINTS only, (sc in next 8 sc, sc2tog) around.  (45)
Rd 10: (sc in next 7 sc, sc2tog) around.  (40)
Rd 11: (sc in next 6 sc, sc2tog) around.  (35)
Rd 12: (sc in next 5 sc, sc2tog) around.  (30)
Rd 13: (sc in next 4 sc, sc2tog) around.  (25)
Rd 14: (sc in next 3 sc, sc2tog) around.  (20)
Rd 15: (sc in next 2 sc, sc2tog) around.  (15)
Rd 16: (sc in next sc, sc2tog) around.  (10)
STUFF HEAD, CROWN POINTS, AND BODY FIRMLY.
Rd 17: sc2tog around.  (5)
Finish off leaving a long tail.  Weave tail through sc of Rd 17 of HEAD, pull tightly and secure.  Weave in ends.  Sew holes between CROWN POINTS closed.

ARMS (MAKE 2):
Rd 1: With buff, ch 2, 4 sc in second ch from hook working around ch.  (4)
Rd 2: 2 sc in each sc around.  (8)
Rd 3: sc in each sc around.  (8)
Rd 4: (sc in next sc, 2 sc in next sc) around.  (12)
Rd 5: (sc in next 3 sc, 2 sc in next sc) around.  (15)
Finish off leaving a long tail.  Sew ARMS to BODY stuffing before closing.

FEET (MAKE 2):
Rd 1: With buff, 6 sc in magic ring.  (6)
Rd 2: (sc in next 2 sc, 2 sc in next sc) around.  (8)
Rd 3: (sc in next 3 sc, 2 sc in next sc) around.  (10)
Rd 4: (sc in next 4 sc, 2 sc in next sc) around.  (12)
Rd 5: (sc in next 3 sc, 2 sc in next sc) around.  (15)
Rds 6-8: sc in each sc around.  (15)
Rd 9: (sc in next 3 sc, sc2tog) around.  (12)
STUFF FEET FIRMLY.
Rd 10: sc2tog around.  (6)
Finish off leaving a long tail.  Weave tail through sc of Rd 10, pull tightly and secure.  Embroider toes on FEET.  Sew FEET to BODY.

FACE:
Embroider FACE on TOGEPI.

BODY MARKINGS:
Using picture above as reference, embroider BODY MARKINGS on BODY.

Togepi, Shiny Togepi, and Pokemon are copyright Nintendo and their respective creators.

This pattern is an original pattern and is © by Christjan Bee (September 2018). Please do not claim this pattern as your own. If you wish to share this pattern, you may link to this pattern but please do not reprint it on your site. You may keep a copy for your own personal use, but you may not sell or distribute it, or sell items made from this pattern.

Saturday, September 29, 2018

AERODACTYL

This has been a Pokemon that I have been thinking about making for some time.  I have been putting it off because of other projects that have come up.  This pattern includes the color list for both Aerodactyl and Shiny Aerodactyl.

MATERIALS:
Worsted Weight Yarn (Shiny alternative in parenthesis): Gray (orchid), baby pink, passion pink, white, orchid (blue), and black.
E crochet hook
Polyester fiberfill
Yarn Needle
Floral wire

BODY:
Rd 1: With gray, 9 sc in magic ring.  (9)
Rd 2: 2 sc in each sc around.  (18)
Rd 3: (sc in next sc, 2 sc in next sc) around.  (27)
Rd 4: sc in next 5 sc, 2 sc in next sc, (sc in next 6 sc, 2 sc in next sc) 3 times.  (31)
Rd 5: sc in next 6 sc, 2 sc in next sc, (sc in next 5 sc, 2 sc in next sc) 4 times.  (36)
Rd 6: (sc in next 8 sc, 2 sc in next sc) around.  (40)
Rds 7-18: sc in each sc around.  (40)
Rd 19: (sc in next 9 sc, sc2tog) twice, sc in next 8 sc, sc2tog, sc in next 8 sc.  (37)
Rd 20: sc in next 11 sc, sc2tog, (sc in next 10 sc, sc2tog) twice.  (34)
Rd 21: (sc in next 7 sc, sc2tog) 3 times, sc in next 7 sc.  (31)
Rd 22: (sc in next 8 sc, sc2tog) twice, sc in next 9 sc, sc2tog.  (28)
Rd 23: (sc in next 12 sc, sc2tog) around.  (26)
Rd 24: (sc in next 11 sc, sc2tog) around.  (24)
Rd 25: (sc in next 10 sc, sc2tog) around.  (22)
Rd 26: (sc in next 9 sc, sc2tog) around.  (20)
Rd 27: (sc in next 8 sc, sc2tog) around.  (18)
Rd 28: (sc in next 7 sc, sc2tog) around.  (16)
Rd 29: (sc in next 6 sc, sc2tog) around.  (14)
BEGIN STUFFING BODY FIRMLY.  CONTINUE STUFFING AS YOU GO ALONG.
Rds 30-37: sc in each sc around.  (14)
Rd 38: (sc in next 6 sc, 2 sc in next sc) around.  (16)
Finish off leaving a long tail.

HEAD:
INSIDE OF MOUTH (MAKE 2—1 IN BABY PINK, 1 IN PASSION PINK):
Rd 1: Ch 5, sc in second ch from hook, sc in next 2 ch, 4 sc in next ch working around ch, working in free loops of foundation ch, sc in next 3 ch.  (10)
Rd 2: Ch 1, turn; sc in next 3 sc, 2 sc in next 4 sc, sc in next 3 sc.  (14)
Finish off.  Weave in ends.

TOP OF MOUTH:
Rd 1: With gray, ch 5, sc in second ch from hook, sc in next 2 ch, 4 sc in next ch working around ch, working in free loops of foundation ch, sc in next 3 ch.  (10)
Rd 2: Ch 1, turn; sc in next 3 sc, 2 sc in next 4 sc, sc in next 3 sc.  (14)
Rds 3-4: Ch 1, turn; sc in each sc around.  (14)
Rd 5: Ch 1, turn; holding next sc on TOP OF MOUTH and passion pink INSIDE OF MOUTH together and working through both thicknesses, sc in next 5 sc, (hdc, dc) in next sc, (dc, hdc) in next sc, sc in next 5 sc.
Finish off.  Weave in ends.

BOTTOM OF MOUTH:
Rd 1: With gray, ch 5, sc in second ch from hook, sc in next 2 ch, 4 sc in next ch working around ch, working in free loops of foundation ch, sc in next 3 ch.  (10)
Rd 2: Ch 1, turn; sc in next 3 sc, 2 sc in next 4 sc, sc in next 3 sc.  (14)
Rd 3: Ch 1, turn; sc in each sc around.  (14)
Rd 4: Ch 1, turn; holding next sc on BOTTOM OF MOUTH and baby pink INSIDE OF MOUTH together and working through both thicknesses, sc in next 2 sc, change to white, [(slip st, ch 1, sc) in next sc] 4 times, change to gray, sc in next 2 sc, change to white, [(slip st, ch 1, sc) in next sc] 4 times, change to gray, sc in next 2 sc.
Finish off.  Weave in ends.  Sew both INSIDE OF MOUTHs together.

BACK OF HEAD:
Rd 1: Attach gray in foundation ch of BOTTOM OF MOUTH, ch 1, sc in same ch as attachment, sc in next 4 Rws, sc in next 3 Rws of TOP OF MOUTH, 2 sc in next 2 sc, 2 sc in foundation ch, 2 sc in next 2 Rws, sc in next 3 Rws, sc in next 4 Rws.  (25)
Rd 2: sc in next 10 sc, (sc in next sc, 2 sc in next sc) 3 times, sc in next 9 sc, slip st in first sc.  (28)
Rds 3-7: sc in each sc around.  (28)
Rd 8: (sc in next 2 sc, sc2tog) around.  (21)
Rd 9: (sc in next sc, sc2tog) around.  (14)
STUFF HEAD FIRMLY.
Rd 10: sc2tog around.  (7)
Finish off leaving a long tail.  Weave tail through sc of Rd 10, pull tightly, and secure.  Weave in ends.  Sew HEAD to BODY.

EYES:
Embroider EYES on AERODACTYL.

EARS (MAKE 2):
Rd 1: With gray, ch 2, 4 sc in second ch from hook working around ch.  (4)
Rd 2: sc in each sc around.  (4)
Rd 3: (sc in next sc, 2 sc in next sc) around.  (6)
Rds 4-5: sc in each sc around.  (6)
Finish off leaving a long tail.  Sew EARS to HEAD stuffing before closing.

TAIL POINT:
Rd 1: With gray, ch 2, 4 sc in second ch from hook working around ch.  (4)
Rd 2: (sc in next sc, 2 sc in next sc) around.  (6)
Rd 3: (sc in next 2 sc, 2 sc in next sc) around.  (8)
Rd 4: (sc in next 3 sc, 2 sc in next sc) around.  (10)
Rd 5: (sc in next 4 sc, 2 sc in next sc) around.  (12)
Rd 6: (sc in next 5 sc, 2 sc in next sc) around.  (14)
Rd 7: (sc in next 6 sc, 2 sc in next sc) around.  (16)
Rd 8: (sc in next 7 sc, 2 sc in next sc) around.  (18)
Finish off leaving a long tail.  Flatten TAIL POINT.  Working through both thicknesses, sew next 3 sc together, sew down one row, sew together next 3 sc, sew back up to top, sew next 3 sc together.

TAIL:
Rd 1: Working open in TAIL POINT, attach gray, ch 1, sc in same sc as attachment, sc in next 2 sc, working in other side of TAIL POINT, sc in next 3 sc.  (6)
Rd 2: (sc in next sc, 2 sc in each sc) around.  (9)
Rds 3-5: sc in each sc around.  (9)
Rd 6: (sc in next 2 sc, 2 sc in next sc) around.  (12)
Rds 7-9: sc in each sc around.  (12)
Rd 10: (sc in next 3 sc, 2 sc in next sc) around.  (15)
Rds 11-13: sc in each sc around.  (15)
Rd 14: (sc in next 4 sc, 2 sc in next sc) around.  (18)
Rds 15-17: sc in each sc around.  (18)
Rd 18: (sc in next 5 sc, 2 sc in next sc) around.  (21)
Rds 19-21: sc in each sc around.  (21)
Rd 22: (sc in next 6 sc, 2 sc in next sc) around.  (24)
Rds 23-25: sc in each sc around.  (24)
Rd 26: (sc in next 11 sc, 2 sc in next sc) around.  (26)
Rds 27-29: sc in each sc around.  (26)
Rd 30: (sc in next 12 sc, 2 sc in next sc) around.  (28)
Rds 31-32: sc in each sc around.  (28)
Finish off leaving a long tail.  Stuff TAIL firmly.  Sew TAIL to BODY.

TOES (MAKE 4):
Rd 1: With gray, ch 2, 4 sc in second ch from hook working around ch.  (4)
Rds 2-4: sc in each sc around.  (4)
Finish off.  Weave in ends.

LEGS (MAKE 2):
Rd 1: With gray, ch 8, 2 sc in second ch from hook, sc in next 5 ch, 3 sc in next ch working around ch, working in free loops of foundation ch, sc in next 6 ch.  (18)
Rd 2: 2 sc in next 2 sc, sc in next 5 sc, 3 sc in next sc, sc in next sc, 3 sc in next sc, sc in next 5 sc, 2 sc in next sc.  (23)
Rd 3: Working in back loops only, sc in next 10 sc, holding next sc on LEGS and first sc on TOES together and working through both thicknesses, sc in next 2 sc, sc in next on LEGS, holding next sc on LEGS and first sc on TOES together and working through both thicknesses, sc in next 2 sc, sc in next 8 sc on LEGS.
Rd 4: sc in next 10 sc, sc in next 2 sc on TOES, sc in next sc on LEGS, sc in next 2 sc on TOES, sc in next 8 sc on LEGS.  (23)
Rd 5: sc in next 9 sc, sc3tog, sc in next sc, sc3tog, sc in next 7 sc.  (19)
Rd 6: sc in next 8 sc, (sc2tog) 3 times, sc in next 5 sc.  (16)
Rd 7: sc in each sc around.  (16)
Rd 8: (sc in next 3 sc, 2 sc in next sc) around.  (20)
Rd 9: (sc in next 3 sc, 2 sc in next sc) around.  (25)
Rds 10-13: sc in each sc around.  (25)
Rd 14: (sc in next 3 sc, sc2tog) around.  (20)
Rd 15: (sc in next 3 sc, sc2tog) around.  (16)
Rd 16: (sc in next 2 sc, sc2tog) around.  (12)
STUFF LEGS FIRMLY
Rd 17: sc2tog around.  (6)
Finish off leaving a long tail.  Weave tail through sc of Rd 17, pull tightly and secure.  Sew LEGS to BODY.

WINGS (MAKE 4—2 IN GRAY, 2 IN ORCHID):
Rw 1: Ch 8, sc in second ch from hook and in each ch across.  (7)
Rw 2: Ch 1, turn; 2 sc in next sc, sc in next 4 sc, sc2tog.  (7)
Rw 3: Ch 1, turn; sc2tog, sc in next 4 sc, 2 sc in next sc.  (7)
Rw 4: Ch 1, turn; 2 sc in next sc, sc in next 4 sc, sc2tog.  (7)
Rws 5-7: Ch 1, turn; sc in each sc across.  (7)
Rw 8: Ch 2, 2 sc in second ch from hook, sc in next 7 sc.  (9)
Rw 9: Ch 1, turn; 2 sc in next sc, sc in next 7 sc, 2 sc in next sc.  (11)
Rw 10: Ch 2, 2 sc in second ch from hook, sc in next 10 sc, 2 sc in next sc.  (14)
Rw 11: Ch 1, turn; 2 sc in next sc, sc in next 12 sc, 2 sc in next sc.  (16)
Rw 12: Ch 2, 2 sc in second ch from hook, sc in next 15 sc, 2sc in next sc.  (19)
Rw 13: Ch 1, turn; sc3tog, sc in next 14 sc, sc2tog.  (16)
Rw 14: Ch 1, turn; sc2tog, sc in next 11 sc, sc3tog.  (13)
Rw 15: Ch 1, turn; sc3tog, sc in next 8 sc, sc2tog.  (10)
Rw 16: Ch 1, turn; sc2tog, sc in next 6 sc, sc2tog. (8)
Rw 17: Ch 1, turn; 2 sc in next sc, sc in next 5 sc, sc2tog.  (8)
Rw 18: Ch 1, turn; sc2tog, sc in next 5 sc, 2 sc in next sc.  (8)
Rw 19: Ch 1, turn; 2 sc in next sc, sc in next 5 sc, sc2tog.  (8)
Rw 20: Ch 1, turn; sc2tog, sc in next 5 sc, 2 sc in next sc.  (8)
Rw 21: Ch 1, turn; 2 sc in next sc, sc in next 5 sc, sc2tog.  (8)
Rw 22: Ch 1, turn; sc2tog, sc in next 5 sc, 2 sc in next sc.  (8)
Rw 23: Ch 2, 2 sc in second ch from hook, sc in next 6 sc, sc2tog.  (9)
Rw 24: Ch 1, turn; sc2tog, sc in next 6 sc, 2 sc in next sc.  (9)
Finish off.  Leave a long tail on the orchid WINGS.  Match up one orchid WING and one gray WING, using orchid tail, sew bottom edge of WINGS together.

ARMS:
Rw 1: Holding WINGS pieces together and working through both thicknesses, attach gray in bottom point of Rw 24 of WINGS, working over floral wire, ch 1, 2 sc in next sc, sc in next 8 sc, working in side of Rows, sc in next 13 rows, (ch 5, sc in second ch from hook, sc in next 3 ch, sc in same row as last sc) 3 times, (sc in free loop of ch-2, sc in next 2 row) 3 times, sc in next 6 rows.
Finish off leaving a long tail.  Sew WINGS to BODY.

BACK HORN:
Rd 1: With gray, 6 sc in magic ring.  (6)
Rds 2-3: sc in each sc around.  (6)
Rd 4: (sc in next sc, 2 sc in next sc) around.  (9)
Rds 5-6: sc in each sc around.  (9)
Finish off leaving a long tail.  Stuff BACK HORN firmly.  Sew BACK HORN to BODY.

Aerodactyl, Shiny Aerodactyl and Pokemon are copyright Nintendo and their respective creators.

This pattern is an original pattern and is © by Christjan Bee (August 2018). Please do not claim this pattern as your own. If you wish to share this pattern, you may link to this pattern but please do not reprint it on your site. You may keep a copy for your own personal use, but you may not sell or distribute it, or sell items made from this pattern.

ALOLAN GRIMER

I am surprised that this request did not come sooner.  I made Alolan Muk back in June.  This pattern includes the color lists for both Alolan Grimer and Shiny Alolan Grimer

MATERIALS:
Worsted Weight Yarn (Shiny colors in parenthesis):  Green tones (Purple tones), black, and gray (pale plum)
E crochet hook
Polyester fiberfill
Yarn Needle
White craft felt
Black fabric marker
Glue

BODY:
Rd 1: With green tones, 8 sc in magic ring.  (8)
Rd 2: 2 sc in each sc around.  (16)
Rd 3: (sc in next sc, 2 sc in next sc) around.  (24)
Rd 4: (sc in next 2 sc, 2 sc in next sc) around.  (32)
Rds 5-8: sc in each sc around.  (32)
Rd 9: Slip st in next sc changing to yellow, ch 1, turn; skip next slip st, sc in next 20 sc, leave remaining sc unworked.  (20)  Change to green tones.
Rds 10-12: Ch 1, turn; sc in each sc around.  (20)
Rd 13: Ch 1, turn; 2 sc in next sc, sc in next 18 sc, 2 sc in next sc.  (22)
Rd 14: Ch 1, turn; sc in each sc around.  (22)
Rd 15: Ch 1, turn; 2 sc in next sc, sc in next 20 sc, 2 sc in next sc.  (24)
Rd 16: Ch 1, turn; sc in each sc around, ch 8, slip st in first sc.  (24)
Rd 17: Ch 1, sc in next 7 sc, 2 sc in next sc, (sc in next 2 sc, 2 sc in next sc) 3 times, sc in next 7 sc, sc in next 8 ch.  (36)
Rds 18-19: sc in each sc around.  (36)
Rd 20: (sc in next 2 sc, 2 sc in next sc) around.  (48)
Rd 21: sc in each sc around.  (48)
Rd 22: (sc in next 4 sc, sc2tog) around.  (40
Rd 23: sc in each sc around.  (40)
Rd 24: (sc in next sc, 2 sc in next sc) around.  (60)
Rd 25: sc in each sc around.  (60)
Rd 26: sc in next 19 sc, (2 sc in next sc, sc in next sc) 9 times, 2 sc in next sc, sc in next 22 sc.  (70)
Finish off.  Weave in ends.

INSIDE MOUTH:
Rd 1: With black, 4 sc in magic ring.  (4)
Rd 2: Ch 1, turn; 2 sc in each sc around.  (8)
Rd 3: Ch 1, turn; (sc in next sc, 2 sc in next sc) around.  (12)
Rw 4: Now working straight edge of half circle, sc evenly 8 times across.  (8)
Rws 5-7: Ch 1, turn; sc in each sc across.  (8)
Rw 8: Ch 1, turn; sc in next sc, change to delft blue, sc in next 6 sc, change to black, sc in next sc.  (8)  Change to delft blue.
Rws 9-11: Ch 1, turn; sc in each sc across.  (8)
Rw 12: Ch 1, turn; sc2tog, sc in next 4 sc, sc2tog.  (6)
Finish off.  Weave in ends.

LIP OOZE:
Rw 1: With yellow, ch 3, slip st in second ch, sc in next ch.  (2)
Rw 2: Ch 6, hdc in second ch from hook, hdc in next 3 ch.  (4)
Finish off.  Weave in ends.

TEETH (MAKE 2):
Rw 1: With white, ch 3, sc in second ch from hook, sc in next ch.  (2)
Finish off.  Weave in ends.

INSIDE MOUTH ATTACHMENT:
Rd 1: Holding INSIDE MOUTH and opening on BODY together and working through both thicknesses, attach yellow in side of MOUTH opening, ch 1, sc in next 8 Rws, sc in next ch, holding next sc on INSIDE MOUTH and next ch on BODY and  side of foundation ch of Rw 1 on LIP OOZE together and working through all thicknesses, sc in next 4 ch, sc in next 3 ch, sc in next 8 Rws, change to green tones, sc in next sc, holding next sc on INSDE MOUTH and next sc on BODY and first sc on TEETH together and working through all thicknesses, sc in next 2 sc, holding next sc on BODY and next sc on INSIDE MOUTH together and working through both thicknesses, sc in next 6 sc, holding next sc on BODY and next sc on INSIDE MOUTH and first sc on TEETH together and working through all thicknesses, sc in next 2 sc, holding next sc on BODY and next sc on INSIDE MOUTH together and working through both thicknesses, sc in next sc, slip st in first sc.
Finish off.  Weave in ends.

BOTTOM:
Rd 1: With green tones, 7 sc in magic ring.  (7)
Rd 2: 2 sc in each sc around.  (14)
Rd 3: (sc in next sc, 2 sc in next sc) around.  (21)
Rd 4: (sc in next 2 sc, 2 sc in next sc) around.  (28)
Rd 5: (sc in next 3 sc, 2 sc in next sc) around.  (35)
Rd 6: (sc in next 4 sc, 2 sc in next sc) around.  (42)
Rd 7: (sc in next 5 sc, 2 sc in next sc) around.  (49)
Rd 8: (sc in next 6 sc, 2 sc in next sc) around.  (56)
Rd 9: (sc in next 7 sc, 2 sc in next sc) around.  (63)
Rd 10: (sc in next 8 sc, 2 sc in next sc) around.  (70)
Rd 11: Holding BOTTOM and BODY together and working through both thicknesses, (sc in next sc, hdc in next sc, dc in next sc, 2 dc in next sc, dc in next sc, hdc in next sc, sc in next sc) around adding any stuffing needed to achieve shape before closing.  (80)
Finish off.  Weave in ends.

FINGERS (MAKE 6):
Rd 1: With green tones, 6 sc in magic ring.  (6)
Rds 2-3: sc in each sc around.  (6)
Finish off.  Weave in ends.

ARMS (MAKE 2):
RIGHT ARM:
Rd 1: With green tones, 6 sc in magic ring.  (6)
Rd 2: (holding next sc of ARM and first sc of FINGER together and working through both thicknesses, sc in next 2 sc) 3 times.  (6)
Rd 3: (sc in next 4 sc on FINGER) 3 times.  (12)
Rd 4: (sc in next sc, 2 sc in next sc) around.  (18)
Rd 5: sc in each sc around.  (18)
Rd 6: Working in front loops only, slip st in next sc, (sc, slip st) in next sc, ch 3, sc in second ch from hook, hdc in next ch, slip st in next sc, working in both loops, sc in next 15 sc.
Rd 7: Working in back loops of Rd 5, hdc in next 3 sc, working in both loops of Rd 6, sc in next 15 sc.
Rd 8: sc in each sc around.  (18)
Rd 9: (sc in next sc, sc2tog) around.  (12)
Rds 10-13: sc in each sc around.  (12)
STUFF RIGHT ARM FIRMLY.
Rd 14: sc2tog around.  (6)
Finish off leaving a long tail.  Weave tail through sc of Rd 14, pull tightly and secure.  Sew RIGHT ARM to BODY.
LEFT ARM:
Rd 1: With green tones, 6 sc in magic ring.  (6)
Rd 2: (holding next sc of ARM and first sc of FINGER together and working through both thicknesses, sc in next 2 sc) 3 times.  (6)
Rd 3: (sc in next 4 sc on FINGER) 3 times.  (12)
Rd 4: (sc in next sc, 2 sc in next sc) around.  (18)
Rds 5-8: sc in each sc around.  (18)
Rd 9: (sc in next sc, sc2tog) around.  (12)
Rd 10: Working in front loops only, slip st in next sc, ch 2, sc in second ch from hook, slip st in next sc, ch 4, sc in second ch from hook, sc in next 2 ch, slip st in next sc, working in both loops, sc in next 9 sc.
Rd 11: Working in back loops of Rd 9, hdc in next 3 sc, working in both loops of Rd 10, sc in next 9 sc.  (12)
Rds 12-13: sc in each sc around.  (12)
STUFF LEFT ARM FIRMLY.
Rd 14: sc2tog around.  (6)
Finish off leaving a long tail.  Weave tail through sc of Rd 14, pull tightly and secure.  Sew LEFT ARM to BODY.

EYES:
Using white and black, embroider EYES on ALOLAN GRIMER.

Alolan Grimer, Alolan Muk, and Shiny Alolan Grimer and Pokemon are copyright Nintendo and their respective creators.

This pattern is an original pattern and is © by Christjan Bee (September 2018). Please do not claim this pattern as your own. If you wish to share this pattern, you may link to this pattern but please do not reprint it on your site. You may keep a copy for your own personal use, but you may not sell or distribute it, or sell items made from this pattern.

MEWTWO'S BLASTOISE

This is an adaptation of my BLASTOISE pattern to make him look like the clone that Mewtwo creates in the “Pokemon: The First Movie.”  This was a request from a co-worker along with the Charizard and Venusaur from the movie as well.  Those patterns are coming soon.

MATERIALS:
Worsted Weight Yarn (Shiny alternative in parenthesis):  Delft blue, cafe latte, coffee, gray, black, white, royal, and buff.
E crochet hook
Polyester Fiberfil
Tapestry needle
Glue

SHELL AND BODY:
Rd 1: With cafe latte, 6 sc in magic ring.  (6)
Rd 2: sc in each sc around.  (12)
Rd 3: (sc in next sc, 2 sc in next sc) around.  (18)
Rd 4: (sc in next 2 sc, 2 sc in next sc) around.  (24)
Rd 5: (sc in next 3 sc, 2 sc in next sc) around.  (30)
Rd 6: (sc in next 4 sc, 2 sc in next sc) around.  (36)
Rd 7: (sc in next 5 sc, 2 sc in next sc) around.  (42)
Rd 8: (sc in next 6 sc, 2 sc in next sc) around.  (48)
Rd 9: (sc in next 7 sc, 2 sc in next sc) around.  (54)
Rd 10: (sc in next 8 sc, 2 sc in next sc) around.  (60)
Rd 11: (sc in next 9 sc, 2 sc in next sc) around.  (66)
Rd 12: (sc in next 10 sc, 2 sc in next sc) around.  (72)
Rds 13-16: sc in each sc around.  (72)  Change to buff.
Rd 17: sc in each sc around.  (72)
Rd 18: (sc in next 10 sc, sc2tog) around.  (66)
Rd 19: (sc in next 9 sc, sc2tog) around.  (60)
Rd 20 (sc in next 8 sc, sc2tog) around.  (54)
Rd 21: (sc in next 7 sc, sc2tog) around.  (48)
Rd 22 (sc in next 6 sc, sc2tog) around.  (42)
Rd 23: (sc in next 5 sc, sc2tog) around.  (36)
Rd 24: (sc in next 4 sc, sc2tog) around.  (30)
BEGIN STUFFING BODY FIRMLY.  CONTINUE STUFFING FIRMLY AS YOU GO ALONG.
Rd 25: (sc in next 3 sc, sc2tog) around.  (24)
Rd 26: (sc in next 2 sc, sc2tog) around.  (18)
Rd 27: (sc in next sc, sc2tog) around.  (12)
Rd 28: sc2tog around.  (6)
Finish off leaving a long tail.  Weave tail through sc of Rd 28, pull tightly, and secure.  Weave in ends.

SMALL TOE NAILS (MAKE 6):
Rd 1: With white, ch 2, 4 sc in second ch from hook working around ch.  (4)
Rd 2: sc in each sc around.  (4)
Finish off.  Weave in ends.

LARGE TOE NAILS (MAKE 2):
Rd 1: With white, 6 sc in magic ring.  (6)
Rds 2-3: sc in each sc around.  (6)
Finish off.  Weave in ends.

LEGS (MAKE 2):
Rd 1: With delft blue, 8 sc in magic ring.  (8)
Rd 2: 2 sc in each sc around.  (16)
Rd 3: Working in back loops only, holding next sc of LEGS and first sc of SMALL TOE NAIL together and working through both thicknesses, sc in next 2 sc, sc in next 3 sc on LEGS, holding next sc of LEGS and first sc of SMALL TOE NAIL together and working through both thicknesses, sc in next 2 sc, holding next sc of LEGS and first sc on LARGE TOE NAIL together and working through both thicknesses, sc in next 4 sc, holding next sc of LEGS and first sc on SMALL TOE NAIL together and working through both thicknesses, sc in next 2 sc, sc in next 3 sc on LEGS.
Rd 4: sc in next 2 sc on SMALL TOE NAIL, sc in next 3 sc on LEGS, sc in next 2 sc on SMALL TOE NAIL, 2 sc in next 2 sc on LARGE TOE NAIL, sc in next 2 sc on SMALL TOE NAIL, sc in next 3 sc on LEGS.  (16)
Rd 5: sc in next 5 sc, (2 sc in next sc, sc in next sc) twice, (sc in next sc, 2 sc in next sc) twice, sc in next 3 sc.  (20)
Rd 6: sc in next 5 sc, (2 sc in next sc, sc in next 2 sc) twice, (sc in next 2 sc, 2 sc in next sc) twice, sc in next 3 sc.  (24)
Rds 7-11: sc in each sc around.  (24)
Rd 12: sc in next 11 sc, (sc2tog) 4 times, sc in next 5 sc.  (20)
Rd 13: sc in next 9 sc, (sc2tog) 4 times, sc in next 3 sc.  (16)
STUFF LEGS FIRMLY.  CONTINUE STUFFING LEGS FIRMLY AS YOU GO ALONG.
Rd 14: (sc in next 2 sc, sc2tog) around.  (12)
Rd 15: sc2tog around.  (6)
Finish off leaving a long tail.  Weave tail through sc of Rd 15, pull tightly and secure.  Sew LEGS to BODY.

TAIL:
Rd 1: With delft blue, ch 2, 4 sc in second ch from hook working around ch.  (4)
Rd 2: sc in each sc around.  (4)
Rd 3: (sc in next sc, 2 sc in next sc) around.  (6)
Rd 4: sc in each sc around.  (6)
Rd 5: (sc in next sc, 2 sc in next sc) around.  (9)
Rd 6: sc in each sc around.  (9)
Rd 7: (sc in next 2 sc, 2 sc in next sc) around.  (12)
Rd 8: sc in each sc around.  (12)
Rd 9: (sc in next 3 sc, 2 sc in next sc) around.  (15)
Rd 10: sc in each sc around.  (15)
Rd 11: (sc in next 4 sc, 2 sc in next sc) around.  (18)
Rd 12: sc in each sc around.  (18)
Rd 13: (sc in next 5 sc, 2 sc in next sc) around.  (21)
Rd 14: sc in each sc around.  (21)
NOW WORKING IN ROWS.
Rw 15: sc in next 11 sc.  (11)
Rw 16: Ch 1, turn; sc2tog, sc in next 7 sc, sc2tog.  (9)
Finish off leaving a long tail.  Stuff TAIL firmly.  Sew TAIL to BODY.

FINGER NAILS (MAKE 6):
Rd 1: With white, ch 2, 4 sc in second ch from hook working around ch.  (4)
Rd 2: sc in each sc around.  (4)
Finish off.  Weave in ends.

ARMS (MAKE 2):
Rw 1: With delft blue, ch 5, sc in second ch from hook and in each ch across.  (4)
Rd 2: Working in free loops of foundation ch, holding next ch on ARMS and first sc on FINGERNAILS together and working through both thicknesses, sc in next st, holding same ch on ARMS as previous sc and next sc on FINGERNAILS together and working through both thicknesses, sc in next sc, holding next ch on ARMS and first sc on FINGERNAILS together and working through both thicknesses, sc in next 2 st, holding next ch on ARMS and first sc on FINGERNAILS together and working through both thicknesses, sc in next ch, holding same ch on ARMS as previous sc and next sc on FINGERNAILS together and working through both thicknesses, sc in next sc, working in sc of Rw 1, holding next sc on ARMS and next sc on FINGERNAILS together and working through thicknesses, sc in next sc, holding same sc on ARMS as previous sc and next sc on FINGERNAILS together and working through both thicknesses, sc in next sc, holding next sc on ARMS and third sc on second FINGERNAILS together and working through both thicknesses, sc in next 2 sc, holding next sc on ARMS and third sc on first FINGERNAILS together and working through both thicknesses, sc in next sc, holding same sc on ARMS as previous sc and next sc on first FINGERNAILS together and working through both thicknesses, sc in next sc.  (12)
Rds 3-10: sc in each sc around.  (12)
Rd 11: (sc in next 3 sc, 2 sc in next sc) around.  (15)
Rds 12-14: sc in each sc around.  (15)
STUFF ARMS FIRMLY.  CONTINUE STUFFING ARMS FIRMLY AS YOU GO ALONG.
Rd 15: (sc in next sc, sc2tog) around.  (10)
Rd 16: sc2tog around.  (5)
Finish off leaving a long tail.  Weave tail through sc of Rd 16, pull tightly and secure.  Sew ARMS to BODY.

WHITE TRIM:
Rw 1: With white, ch 121, hdc in second ch from hook and in each ch across.  (120)
Finish off leaving a long tail.  Sew WHITE TRIM to MEWTWO’S BLASTOISE wrapping it around ARMS.

NECK OPENING:
Rw 1: With black, ch 23, sc in second ch from hook and in each ch across.  (22)
Rw 2: Ch 1, turn; sc2tog, sc in next 18 sc, sc2tog.  (20)
Rw 3: Ch 1, turn; sc2tog, sc in next 16 sc, sc2tog.  (18)
Rw 4: Ch 1, turn; sc2tog, sc in next 14 sc, sc2tog.  (16)
Rw 5: Ch 1, turn; sc2tog, sc in next 12 sc, sc2tog.  (14)
Rw 6: Ch 1, turn; sc2tog, sc in next 10 sc, sc2tog.  (12)
Rw 7: Ch 1, turn; sc2tog, sc in next 2 sc, hdc in next 4 sc, sc in next 2 sc, sc2tog.  (10)
Finish off leaving a long tail.  Sew NECK OPENING to BODY.

HEAD:
Rd 1: With delft blue, 8 sc in magic ring.  (8)
Rd 2: 2 sc in each sc around.  (16)
Rd 3: (sc in next sc, 2 sc in next sc) around.  (24)
Rd 4: (sc in next 2 sc, 2 sc in next sc) around.  (32)
Rd 5: (sc in next 3 sc, 2 sc in next sc) around.  (40)
Rds 6-12: sc in each sc around.  (40)
Rd 13: (sc in next 3 sc, sc2tog) around.  (32)
Rd 14: (sc in next 2 sc, sc2tog) around.  (24)
Rd 15: (sc in next sc, sc2tog) around.  (16)
STUFF HEAD FIRMLY.
Rd 16: sc2tog around.  (8)
Finish off leaving a long tail.  Weave tail through sc of Rd 16, pull tightly and secure.  Once MUZZLE and EARS are sewn on, sew HEAD to BODY on NECK OPENING.

MUZZLE:
Rd 1: With delft blue, 3 sc, change to buff, 3 sc in magic ring, slip st in first sc.  (6)
Rd 2: Ch 1, turn; 2 sc in next 3 sc, change to delft blue, 2 sc in next 3 sc, slip st in first sc.  (12)
Rd 3: Ch 1, turn; (sc in next sc, 2 sc in next sc) 3 times, change to buff, (sc in next sc, 2 sc in next sc) 3 times, slip st in first sc.  (18)
Rd 4: Ch 1, turn; (sc in next 2 sc, 2 sc in next sc) 3 times, change to delft blue, (sc in next 2 sc, 2 sc in next sc) 3 times, slip st in first sc.  (24)
Rd 5: Ch 1, turn; sc in next 12 sc, change to buff, sc in next 12 sc, slip st in first sc.  (24)
Rd 6: Ch 1, turn; sc in next 12 sc, change to delft blue, sc in next 12 sc, slip st in first sc.  (24)
Rd 7: Ch 1, turn; sc in next 12 sc, change to buff, sc in next 12 sc, slip st in first sc.  (24)
NOW WORKING IN ROWS.
Rw 8: Ch 1, turn; sc2tog, sc in next 8 sc, sc2tog.  (10)
Rw 9: Ch 1, turn; sc2tog, sc in next 6 sc, sc2tog.  (8)
Rw 10: Ch 1, turn; sc2tog, sc in next 4 sc, sc2tog.  (6)
Finish off leaving a long tail in each color.  Sew MUZZLE to HEAD stuffing MUZZLE firmly before closing.  Weave in ends.

EARS (MAKE 2):
INNER EARS (MAKE 2):
Rw 1: With black, ch 2, (sc, dc, sc) in second ch from hook.  (3)
Finish off.  Weave in ends.
OUTER EARS (MAKE 2):
Rw 1: With delft blue, ch 2, (sc, dc, sc) in second ch from hook.  (3)
Rw 2: Holding INNER EAR and OUTER EAR together and working through both thicknesses, ch 1, turn; 2 sc in next st, 3 sc in next st, 2 sc in next st.  (7)
Finish off leaving a long tail.  Sew EARS to HEAD.

HEAD MARKINGS, NOSTRILS AND EYES:
Embroider HEAD MARKINGS, NOSTRILS and EYES on MEWTWO’S BLASTOISE.

CANNONS (MAKE 2):
Rd 1: With gray, 4 sc in magic ring.  (4)
Rd 2: 2 sc in each sc around.  (8)
Rd 3: Working in back loops only, sc in each sc around.  (8)
Rds 4-6: sc in each sc around.  (8)
BEGIN STUFFING CANNONS FIRMLY.  CONTINUE STUFFING FIRMLY AS YOU GO ALONG.
Rd 7: sc2tog around.  (4)
Rd 8: sc in each sc around.  (4)
Rd 9: (sc in next sc, 2 sc in next sc) around.  (6)
Rd 10: sc in each sc around.  (6)
Rd 11: (sc in next sc, 2 sc in next sc) around.  (9)
Finish off leaving a long tail.  Sew CANNON to SHELL.

CANNON HOUSING (MAKE 2):
Rw 1: With cafe latte, ch 10, 2 sc in second ch from hook, sc in next 7 ch, 2 sc in next ch.  (11)
Rw 2: Ch 1, turn; 2 sc in next sc, sc in next 9 sc, 2 sc in next sc.  (13)
Rw 3: Ch 1, turn; 2 sc in next sc, sc in next 11 sc, 2 sc in next sc.  (15)
Finish off leaving a long tail.  Sew CANNON HOUSING to SHELL around CANNONS.

SHELL MARKINGS:
Using coffee, embroider SHELL MARKINGS on SHELL.

Mewtwo, Blastoise and Pokemon are copyright Nintendo and their respective creators.

This pattern is an original pattern and is © by Christjan Bee (September 2018). Please do not claim this pattern as your own. If you wish to share this pattern, you may link to this pattern but please do not reprint it on your site. You may keep a copy for your own personal use, but you may not sell or distribute it, or sell items made from this pattern.

MEWTWO'S CHARIZARD

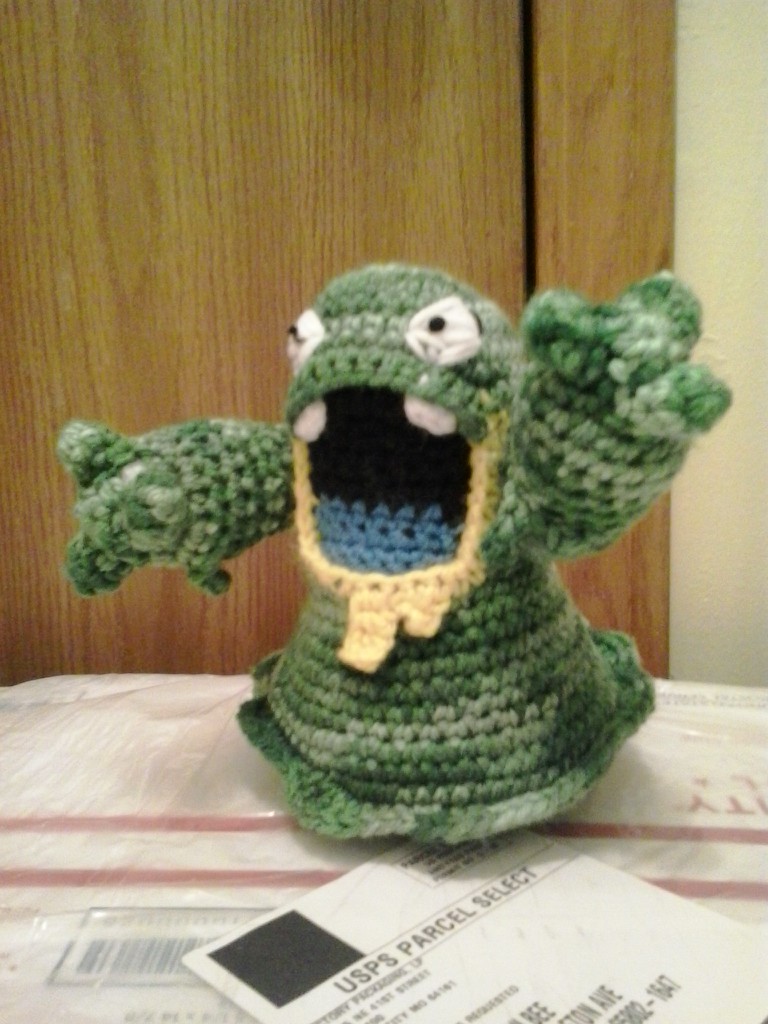
This is an adaptation of my Charizard pattern to look like the clone of Charizard that Mewtwo creates in the “Pokemon: The First Movie.”  This was a request from a co-worker.  He also requested the clone version of Blastoise and Venusaur.  Those patterns are coming soon.

MATERIALS:
Worsted Weight Yarn:  Orange, real teal, burnt pumpkin, off white, white, black, yellow, baby pink, and red.
E crochet hook
Polyester fiberfill
Yarn Needle
Floral wire

FINGERS (MAKE 6):
Rd 1: With white, ch 2, 4 sc in second ch from hook working around ch, slip st in first sc changing to orange.  (4)
Rds 2-3: sc in each sc around.  (4)
Finish off in FINGERS 1-4, do not finish off in FINGERS 5 and 6.

ARMS (MAKE 2):
Rd 1: sc in next 2 sc of FINGERS 5 or 6, sc in next 2 sc of FINGERS 1 or 2, sc in next 4 sc of FINGERS 3 or 4, sc in next 2 sc of FINGERS 1 or 2, sc in next 2 sc of FINGERS 5 or 6. (12)
Rd 2: sc in each sc around.  (12)
Rd 3: (sc in next 4 sc, sc2tog) around.  (10)
Rd 4: (sc in next 3 sc, sc2tog) around, slip st in first sc.  (8)
BEGIN STUFFING ARMS FIRMLY.  CONTINUE STUFFING AS YOU GO ALONG.
Rds 5-9: Ch 1, turn; sc in each sc around, slip st in first sc.  (8)
Rd 10: Ch 1, turn; sc in next sc, change to burnt pumpkin, sc in next 4 sc, change to orange, sc in next 3 sc, slip st in first sc.  (8)
Rds 11-14: Ch 1, turn; sc in each sc around, slip st in first sc.  (8)
Rd 15: Ch 1, turn; sc in next 3 sc, change to burnt pumpkin, sc in next 4 sc, change to orange, sc in next sc, slip st in first sc.  (8)
Rds 16-17: Ch 1, turn; sc in each sc around, slip st in first sc.  (8)
Finish off.

BODY:
Rd 1: With orange, 9 sc in magic ring.  (9)
Rd 2: 2 sc in each sc around.  (18)
Rd 3: (sc in next sc, 2 sc in next sc) around.  (27)
Rd 4: sc in next 5 sc, 2 sc in next sc, (sc in next 6 sc, 2 sc in next sc) 3 times.  (31)
Rd 5: sc in next 6 sc, 2 sc in next sc, (sc in next 5 sc, 2 sc in next sc) 4 times.  (36)
Rd 6: (sc in next 8 sc, 2 sc in next sc) around.  (40)
Rd 7: (sc in next 9 sc, 2 sc in next sc) around.  (44)
Rd 8: (sc in next 10 sc, 2 sc in next sc) around, slip st in first sc.  (48)
Rds 9-13: Ch 1, turn; sc in each sc around, slip st in first sc.  (48)
Rd 14: Ch 1, turn; sc in next 20 sc, change to burnt pumpkin, sc in next 8 sc, change to orange, sc in next 20 sc, slip st in first sc.  (48)
Rd 15: Ch 1, turn; sc in next 16 sc, change to burnt pumpkin, sc in next 16 sc, change to orange, sc in next 16 sc, slip st in first sc.  (48)
Rds 16-20: Ch 1, turn; sc in each sc around, slip st in first sc.  (48)
Rd 21: Ch 1, turn; sc in next 4 sc, sc2tog, sc in next 10 sc, sc2tog, sc in next 2 sc, change to burnt pumpkin, sc in next 8 sc, change to orange, sc in next 2 sc, sc2tog, sc in next 10 sc, sc2tog, sc in next 4 sc, slip st in first sc.  (44)
Rd 22: Ch 1, turn; (sc in next 5 sc, sc2tog) twice, change to burnt pumpkin, sc in next 16 sc, change to orange, (sc2tog, sc in next 5 sc) twice, slip st in first sc.  (40)
Rd 23: Ch 1, turn; (sc in next 8 sc, sc2tog) around, slip st in first sc.  (36)
Rd 24: Ch 1, turn; (sc in next 7 sc, sc2tog) around, slip st in first sc.  (32)
Rd 25: Ch 1, turn; (sc in next 6 sc, sc2tog) around, slip st in first sc.  (28)
Rd 26: Ch 1, turn; (sc in next 12 sc, sc2tog) around, slip st in first sc.  (26)
Rd 27: Ch 1, turn; sc in next 6 sc, sc2tog, sc in next 11 sc, sc2tog, sc in next 5 sc, slip st in first sc.  (24)
Rd 28: Ch 1, turn; sc in next 5 sc, holding next sc on BODY and sc #1 on LEFT ARM together and working through both thicknesses, sc in next 2 sc, sc in next 10 sc on BODY, holding next sc on BODY and sc #1 on RIGHT ARM together and working through both thicknesses, sc in next 2 sc, sc in next 5 sc, slip st in first sc.
Rd 29: Ch 1, turn; sc in next 5 sc, sc in next sc on ARM, working behind same ARM, sc in next sc, ch 1, sc in next sc, skip next 4 sc on ARM, sc in next sc, sc in next 10 sc on BODY, sc in next sc on ARM, working behind same ARM, sc in next sc, ch 1, sc in next sc, skip next 4 sc on ARM, sc in next sc, sc in next 5 sc on BODY, slip st in first sc.
Rd 30: Ch 1, turn; sc in next 6 sc, change to burnt pumpkin, sc in next 4 sc on ARM, change to orange, sc in next 12 sc on BODY, change to burnt pumpkin, sc in next 4 sc on ARM, change to orange, sc in next 6 sc, slip st in first sc.  (32)
BEGIN STUFFING BODY FIRMLY.  CONTINUE STUFFING AS YOU GO ALONG.
Rds 31-32: Ch 1, turn; sc in next 6 sc, change to burnt pumpkin, sc in next 4 sc, change to orange, sc in next 12 sc, change to burnt pumpkin, sc in next 4 sc, change to orange, sc in next 6 sc, slip st in first sc.  (32)
Rd 33: Ch 1, turn; sc in next 5 sc, (sc2tog) 3 times, sc in next 10 sc, (sc2tog) 3 times, sc in next 5 sc, slip st in first sc.  (26)
Rd 34: Ch 1, turn; sc in next 3 sc, (sc2tog) 3 times, sc in next 8 sc, (sc2tog) 3 times, sc in next 3 sc, slip st in first sc.  (20)
Rd 35: Ch 1, turn; sc in next 4 sc, sc2tog, change to burnt pumpkin, sc in next 8 sc, change to orange, sc2tog, sc in next 4 sc, slip st in first sc.  (18)
Rds 36-37: Ch 1, turn; sc in each sc around, slip st in first sc.  (18)
Rd 38: Ch 1, turn; sc in next 6 sc, change to burnt pumpkin, sc in next 6 sc, change to orange, sc in next 6 sc, slip st in first sc.  (18)
Rd 39: Ch 1, turn; sc in next 8 sc, sc2tog, sc in next 8 sc, slip st in first sc.  (17)
Rd 40: Ch 1, turn; sc in each sc around, slip st in first sc.  (17)
Rd 41: Ch 1, turn; sc in next 5 sc, change to burnt pumpkin, sc in next 7 sc, change to orange, sc in next 5 sc, slip st in first sc.  (17)
Rd 42: Ch 1, turn; sc in each sc around, slip st in first sc.  (17)
Rd 43: Ch 1, turn; sc2tog, sc in next 15 sc, slip st in first sc.  (16)
Rds 44-46: Ch 1, turn; sc in each sc around, slip st in first sc.  (16)
Finish off leaving a long tail.

TAIL:
Rd 1: With orange, 6 sc in magic ring, slip st in first sc.  (6)
Rd 2: Ch 1, turn; sc in each sc around, slip st in first sc.  (6)
Rd 3: Ch 1, turn; (sc in next sc, 2 sc in each sc) around, slip st in first sc.  (9)
Rd 4: Ch 1, turn; sc in each sc around, slip st in first sc.  (9)
Rd 5: Ch 1, turn; sc in next 2 sc, change to burnt pumpkin, sc in next 5 sc, change to orange, sc in next 2 sc, slip st in first sc.  (9)
Rd 6: Ch 1, turn; sc in each sc around, slip st in first sc.  (9)
Rd 7: Ch 1, turn; (sc in next 2 sc, 2 sc in next sc) around, slip st in first sc.  (12)
Rd 8: Ch 1, turn; sc in each sc around, slip st in first sc.  (12)
Rd 9: Ch 1, turn; sc in next 3 sc, change to burnt pumpkin, sc in next 6 sc, change to orange, sc in next 3 sc, slip st in first sc.  (12)
Rd 10: Ch 1, turn; sc in each sc around, slip st in first sc.  (12)
Rd 11: Ch 1, turn; (2 sc in next sc, sc in next 3 sc) around, slip st in first sc.  (15)
Rd 12: Ch 1, turn; sc in each sc around, slip st in first sc.  (15)
Rd 13: Ch 1, turn; sc in next 4 sc, change to burnt pumpkin, sc in next 7 sc, change to orange, sc in next 4 sc, slip st in first sc.  (15)
Rd 14: Ch 1, turn; sc in each sc around, slip st in first sc.  (15)
Rd 15: Ch 1, turn; (sc in next 4 sc, 2 sc in next sc) around, slip st in first sc.  (18)
Rd 16: Ch 1, turn; sc in each sc around, slip st in first sc.  (18)
Rd 17: Ch 1, turn; sc in next 5 sc, change to burnt pumpkin, sc in next 8 sc, change to orange, sc in next 5 sc, slip st in first sc.  (18)
Rd 18: Ch 1, turn; sc in each sc around, slip st in first sc.  (18)
Rd 19: Ch 1, turn; (2 sc in next sc, sc in next 5 sc) around, slip st in first sc.  (21)
Rd 20: Ch 1, turn; sc in each sc around, slip st in first sc.  (21)
Rd 21: Ch 1, turn; sc in next 6 sc, change to burnt pumpkin, sc in next 9 sc, change to orange, sc in next 6 sc, slip st in first sc.  (21)
Rd 22: Ch 1, turn; sc in each sc around, slip st in first sc.  (21)
Rd 23: Ch 1, turn; (sc in next 6 sc, 2 sc in next sc) around, slip st in first sc.  (24)
Rd 24: Ch 1, turn; sc in each sc around, slip st in first sc.  (24)
Rd 25: Ch 1, turn; sc in next 7 sc, change to burnt pumpkin, sc in next 10 sc, change to orange, sc in next 7 sc, slip st in first sc.  (24)
Rd 26: Ch 1, turn; sc in each sc around, slip st in first sc.  (24)
Rd 27: Ch 1, turn; (2 sc in next sc, sc in next 7 sc) around, slip st in first sc.  (27)
Rd 28: Ch 1, turn; sc in each sc around, slip st in first sc.  (27)
Rd 29: Ch 1, turn; sc in next 8 sc, change to burnt pumpkin, sc in next 11 sc, change to orange, sc in next 8 sc, slip st in first sc.  (27)
Rd 30: Ch 1, turn; sc in each sc around, slip st in first sc.  (27)
Rd 31: Ch 1, turn; (sc in next 8 sc, 2 sc in next sc) around, slip st in first sc.  (30)
Rd 32: Ch 1, turn; sc in each sc around, slip st in first sc.  (30)
Rd 33: Ch 1, turn; sc in next 9 sc, change to burnt pumpkin, sc in next 12 sc, change to orange, sc in next 9 sc, slip st in first sc.  (30)
Rd 34: Ch 1, turn; sc in each sc around, slip st in first sc.  (30)
Rd 35: Ch 1, turn; (2 sc in next sc, sc in next 9 sc) around, slip st in first sc.  (33)
Rd 36: Ch 1, turn; sc in each sc around, slip st in first sc.  (33)
Rd 37: Ch 1, turn; sc in next 10 sc, change to burnt pumpkin, sc in next 13 sc, change to orange, sc in next 10 sc, slip st in first sc.  (33)
Rd 38: Ch 1, turn; sc in each sc around, slip st in first sc.  (33)
Finish off leaving a long tail.  Stuff TAIL firmly.  Sew TAIL to BODY.

FLAME:
Cut 2 8-inch pieces each of yellow, orange and red.  Fringe onto end of TAIL.  Using needle, separate plies of yarn.

BELLY:
Rw 1: With off white, ch 9, sc in second ch from hook and in each ch across.  (8)
Rw 2: Ch 1, turn; 2 sc in next sc, sc in next 6 sc, 2 sc in next sc.  (10)
Rw 3: Ch 1, turn; 2 sc in next sc, sc in next 8 sc, 2 sc in next sc.  (12)
Rw 4: Ch 1, turn; sc in each sc across.  (12)
Rw 5: Ch 1, turn; 2 sc in next sc, sc in next 10 sc, 2 sc in next sc.  (14)
Rw 6: Ch 1, turn; sc in each sc across.  (14)
Rw 7: Ch 1, turn; 2 sc in next sc, sc in next 12 sc, 2 sc in next sc.  (16)
Rw 8: Ch 1, turn; sc in each sc across.  (16)
Rw 9: Ch 1, turn; 2 sc in next sc, sc in next 14 sc, 2 sc in next sc.  (18)
Rw 10: Ch 1, turn; sc in each sc across.  (18)
Rw 11: Ch 1, turn; 2 sc in next sc, sc in next 16 sc, 2 sc in next sc.  (20)
Rws 12-18: Ch 1, turn; sc in each sc across.  (20)
Rw 19: Ch 1, turn; sc2tog, sc in next 16 sc, sc2tog.  (18)
Rw 20: Ch 1, turn; sc2tog, sc in next 14 sc, sc2tog.  (16)
Rw 21: Ch 1, turn; sc2tog, sc in next 12 sc, sc2tog.  (14)
Rws 22-30: Ch 1, turn; sc in each sc across.  (14)
Rw 31: Ch 1, turn; sc2tog, sc in next 10 sc, sc2tog.  (12)
Rws 32-34: Ch 1, turn; sc in each sc across.  (12)
Rw 35: Ch 1, turn; sc2tog, sc in next 8 sc, sc2tog.  (10)
Rw 36: Ch 1, turn; sc in next 4 sc, sc2tog, sc in next 4 sc.  (9)
Rw 37: Ch 1, turn; sc in each sc across.  (9)
Rw 38: Ch 1, turn; sc in next 4 sc, sc2tog, sc in next 3 sc.  (8)
Rw 39: Ch 1, turn; sc in each sc across.  (8)
Rw 40: Ch 1, turn; sc in next 3 sc, sc2tog, sc in next 3 sc.  (7)
Rws 41-43: Ch 1, turn; sc in each sc across.  (7)
Rw 44: Ch 1, turn; sc in next 3 sc, sc2tog, sc in next 2 sc.  (6)
Rws 45-47: Ch 1, turn; sc in each sc across.  (6)
Rw 48: Ch 1, turn; sc in next 2 sc, sc2tog, sc in next 2 sc.  (5)
Rws 49-52: Ch 1, turn; sc in each sc across.  (5)
Rw 53: Ch 1, turn; sc in next 2 sc, sc2tog, sc in next sc.  (4)
Rws 54-58: Ch 1, turn; sc in each sc across.  (4)
Rw 59: Ch 1, turn; sc in next sc, sc2tog, sc in next sc.  (3)
Rws 60-62: Ch 1, turn; sc in each sc across.  (3)
Rw 63: Ch 1, turn; sc in next sc, sc2tog.  (2)
Rw 64: Ch 1, turn; sc in each sc across.  (2)
Rw 65: Ch 1, turn; sc2tog.  (1)
Rd 66: Ch 1, sc in each row, ch, and sc around outside of edge of BELLY, slip st in first sc.
Finish of leaving a long tail.  Sew BELLY to BODY and TAIL.  Weave in ends.

TOENAILS (MAKE 6):
Rd 1: With white, ch 2, 4 sc in second ch from hook working around ch.  (4)
Rd 2: sc in each sc around.  (4)
Finish off.  Weave in ends.

LEGS (MAKE 2):
Rd 1: With orange, ch 8, 2 sc in second ch from hook, sc in next 5 ch, 3 sc in next ch working around ch, working in free loops of foundation ch, sc in next 6 ch.  (18)
Rd 2: 2 sc in next 2 sc, sc in next 5 sc, 2 sc in next 3 sc, sc in next 5 sc, 2 sc in next sc.  (22)
Rd 3: (sc in next sc, 2 sc in next sc) twice, sc in next 6 sc, 3 sc in next sc, sc in next 2 sc, 3 sc in next sc, sc in next 7 sc, 2 sc in next sc.  (29)
Rd 4: working in back loops only, sc in next 13 sc, (holding next sc on LEG and first sc on TOENAIL together and working through both thicknesses, sc in next 2 sc) 3 times, sc in next 10 sc on LEGS.  (29)
Rd 5: sc in next 13 sc, (sc in next 2 sc of TOENAILS) 3 times, sc in next 10 sc on LEGS.  (29)
Rd 6: (sc in next sc, sc2tog) twice, sc in next 7 sc, sc3tog, sc in next 2 sc, sc3tog, sc in next 6 sc, sc2tog.  (22)
Rd 7: (sc2tog) twice, sc in next 5 sc, (sc2tog) 4 times, sc in next 5 sc.  (16)
Rd 8: sc in each sc around.  (16)
Rd 9: (sc in next 7 sc, 2 sc in next sc) around.  (18)
Rd 10: (sc in next 2 sc, 2 sc in next sc) around, slip st in first sc.  (24)
LEFT LEG:
Rd 11: Ch 1, (sc in next 3 sc, 2 sc in next sc) 3 times, change to burnt pumpkin, sc in next 2 sc, change to orange, sc in next sc, 2 sc in next sc, (sc in next 3 sc, 2 sc in next sc) twice, slip st in first sc.  (30)
Rd 12: Ch 1, turn; sc in each sc around, slip st in first sc.  (30)
Rd 13: Ch 1, turn; sc in next 15 sc, change to burnt pumpkin, sc in next 5 sc, change to orange, sc in next 10 sc, slip st in first sc.  (30)
Rds 14-15: Ch 1, turn; sc in each sc around, slip st in first sc.  (30)
Rd 16: Ch 1, turn; sc in next 10 sc, change to burnt pumpkin, sc in next 5 sc, change to orange, sc in next 15 sc, slip st in first sc.  (30)
Rd 17: Ch 1, (sc in next 3 sc, sc2tog) around.  (24)
Rd 18: (sc in next 2 sc, sc2tog) around.  (18)
Rd 19: (sc in next sc, sc2tog) around.  (12)
STUFF LEGS FIRMLY
Rd 20: sc2tog around.  (6)
Finish off leaving a long tail.  Weave tail through sc of Rd 20, pull tightly and secure.  Sew LEFT LEG to BODY.
RIGHT LEG:
Rd 11: Ch 1, turn; (sc in next 3 sc, 2 sc in next sc) twice, change to burnt pumpkin, sc in next 2 sc, change to orange, sc in next sc, 2 sc in next sc, (sc in next 3 sc, 2 sc in next sc) 3 times, slip st in first sc.  (30)
Rd 12: Ch 1, turn; sc in each sc around, slip st in first sc.  (30)
Rd 13: Ch 1, turn; sc in next 10 sc, change to burnt pumpkin, sc in next 5 sc, change to orange, sc in next 15 sc, slip st in first sc.  (30)
Rds 14-15: Ch 1, turn; sc in each sc around, slip st in first sc.  (30)
Rd 16: Ch 1, turn; sc in next 15 sc, change to burnt pumpkin, sc in next 5 sc, change to orange, sc in next 10 sc, slip st in first sc.  (30)
Rd 17: Ch 1, turn; (sc in next 3 sc, sc2tog) around.  (24)
Rd 18: (sc in next 2 sc, sc2tog) around.  (18)
Rd 19: (sc in next sc, sc2tog) around.  (12)
STUFF LEGS FIRMLY
Rd 20: sc2tog around.  (6)
Finish off leaving a long tail.  Weave tail through sc of Rd 20, pull tightly and secure.  Sew RIGHT LEG to BODY.

WINGS (MAKE 4—2 IN ORANGE, 2 IN REAL TEAL):
Rw 1: Ch 8, sc in second ch from hook and in each ch across.  (7)
Rw 2: Ch 1, turn; 2 sc in next sc, sc in next 4 sc, sc2tog.  (7)
Rw 3: Ch 1, turn; sc2tog, sc in next 4 sc, 2 sc in next sc.  (7)
Rw 4: Ch 1, turn; 2 sc in next sc, sc in next 4 sc, sc2tog.  (7)
Rws 5-7: Ch 1, turn; sc in each sc across.  (7)
Rw 8: Ch 2, 2 sc in second ch from hook, sc in next 7 sc.  (9)
Rw 9: Ch 1, turn; 2 sc in next sc, sc in next 7 sc, 2 sc in next sc.  (11)
Rw 10: Ch 2, 2 sc in second ch from hook, sc in next 10 sc, 2 sc in next sc.  (14)
Rw 11: Ch 1, turn; 2 sc in next sc, sc in next 12 sc, 2 sc in next sc.  (16)
Rw 12: Ch 2, 2 sc in second ch from hook, sc in next 15 sc, 2sc in next sc.  (19)
Rw 13: Ch 1, turn; sc3tog, sc in next 14 sc, sc2tog.  (16)
Rw 14: Ch 1, turn; sc2tog, sc in next 11 sc, sc3tog.  (13)
Rw 15: Ch 1, turn; sc3tog, sc in next 8 sc, sc2tog.  (10)
Rw 16: Ch 1, turn; sc2tog, sc in next 6 sc, sc2tog. (8)
Rw 17: Ch 1, turn; 2 sc in next sc, sc in next 5 sc, sc2tog.  (8)
Rw 18: Ch 1, turn; sc2tog, sc in next 5 sc, 2 sc in next sc.  (8)
Rw 19: Ch 1, turn; 2 sc in next sc, sc in next 5 sc, sc2tog.  (8)
Rw 20: Ch 1, turn; sc2tog, sc in next 5 sc, 2 sc in next sc.  (8)
Rw 21: Ch 1, turn; 2 sc in next sc, sc in next 5 sc, sc2tog.  (8)
Rw 22: Ch 1, turn; sc2tog, sc in next 5 sc, 2 sc in next sc.  (8)
Rw 23: Ch 2, 2 sc in second ch from hook, sc in next 6 sc, sc2tog.  (9)
Rw 24: Ch 1, turn; sc2tog, sc in next 6 sc, 2 sc in next sc.  (9)
Finish off.  Leave a long tail on the real teal WINGS.  Match up one real teal WING and one orange WING, using teal tail, sew bottom edge of WINGS together.

WING ARMS:
Rw 1: Holding Wings pieces together and working through both thicknesses, attach orange in bottom point of Rw 24 of WINGS, working over floral wire, ch 1, 2 sc in next sc, sc in next 8 sc, working in side of Rows, sc in next 13 rows, ch 5, sc in second ch from hook, sc in next 3 ch, sc in next same row as last sc, (sc in free loop of ch-2, sc in next 2 row) 3 times, sc in next 6 rows.
Finish off leaving a long tail.  Sew WINGS to BODY.

HEAD:
INSIDE OF MOUTH (MAKE 2):
Rd 1: With baby pink, ch 5, sc in second ch from hook, sc in next 2 ch, 4 sc in next ch working around ch, working in free loops of foundation ch, sc in next 3 ch.  (10)
Rd 2: Ch 1, turn; sc in next 3 sc, 2 sc in next 4 sc, sc in next 3 sc.  (14)
Finish off.  Weave in ends.

BOTTOM OF MOUTH:
Rd 1: With orange, ch 5, sc in second ch from hook, sc in next 2 ch, 4 sc in next ch working around ch, working in free loops of foundation ch, sc in next 3 ch.  (10)
Rd 2: Ch 1, turn; sc in next 3 sc, 2 sc in next 4 sc, sc in next 3 sc.  (14)
Rds 3-4: Ch 1, turn; sc in each sc around.  (14)
Finish off leaving a long tail.  Sew BOTTOM OF MOUTH to INSIDE OF MOUTH.

TEETH (MAKE 2):
Rw 1: With white, ch 2, sc in second ch from hook.  (1)
Finish off leaving a long tail.

TOP OF MOUTH:
Rd 1: With orange, ch 5, sc in second ch from hook, change to burnt orange, sc in next ch, change to orange, sc in next ch, change to burnt pumpkin, (sc, change to orange, 2 sc, change to burnt pumpkin, sc) in next ch working around ch, change to orange, working in free loops of foundation ch, sc in next ch, change to burnt pumpkin, sc in next ch, change to orange, sc in next ch.  (10)
Rd 2: Ch 1, turn; sc in next sc, change to burnt pumpkin, sc in next sc, change to orange, sc in next sc, change to burnt pumpkin, (sc, change to orange, sc) in next sc, 2 sc in next 2 sc, (sc, change to burnt pumpkin, sc) in next sc, change to orange, sc in next sc, change to burnt pumpkin, sc in next sc, change to orange, sc in next sc.  (14)
Rds 3-5: Ch 1, turn; sc in each sc around.  (14)
Finish off leaving a long tail.  Sew TEETH to TOP OF MOUTH.  Sew TOP OF MOUTH and TEETH to INSIDE OF MOUTH. Sew INSIDE OF MOUTHS together.

BACK OF HEAD:
Rd 1: Attach orange in side of Rw 5 of TOP OF HEAD, ch 1, sc in same sc as attachment, sc in next 2 Rws, change to burnt pumpkin, 2 sc in next 2 Rws, 2 sc in foundation ch, 2 sc in next 2 Rws, change to orange, sc in next 3 Rws, working in BOTTOM OF MOUTH, sc in next 4 Rws, sc in foundation ch, sc in next 4 Rws, slip st in first sc.  (25)
Rd 2: Ch 1, turn; sc in next 12 sc, change to burnt pumpkin, sc in next 2 sc, (sc in next sc, 2 sc in next sc) 3 times, sc in next 2 sc, change to orange, sc in next 3 sc, slip st in first sc.  (28)
Rd 3: Ch 1, turn; sc in next 3 sc, change to burnt pumpkin, sc in next 13 sc, change to orange, sc in next 12 sc, slip st in first sc.  (28)
Rd 4: Ch 1, turn; sc in next 12 sc, change to burnt pumpkin, sc in next 13 sc, change to orange, sc in next 3 sc, slip st in first sc.  (28)
Rd 5: Ch 1, turn; sc in each sc around.  (28)
Rds 6-7: sc in each sc around.  (28)
Rd 8: (sc in next 2 sc, sc2tog) around.  (21)
Rd 9: (sc in next sc, sc2tog) around.  (14)
STUFF HEAD FIRMLY.
Rd 10: sc2tog around.  (7)
Finish off leaving a long tail.  Weave tail through sc of Rd 10, pull tightly, and secure.  Weave in ends.  Sew HEAD to BODY.

EYES AND NOSTRILS:
Embroider EYES and NOSTRILS on MEGA CHARIZARD X.

EYEBROWS (MAKE 2):
Rw 1: With burnt pumpkin, ch 6, slip st in second ch from hook, sc in next 3 ch, slip st in next ch. (5)
Finish off leaving a long tail.  Sew EYEBROWS to HEAD.

HORNS (MAKE 2):
Rd 1: With orange, 6 sc in magic ring.  (6)
Rds 2-4: sc in each sc around.  (6)
Rd 5: (sc in next 2 sc, 2 sc in next sc) around, slip st in first sc.  (8)
Rd 6: Ch 1, turn; sc in next 2 sc, change to burnt pumpkin, sc in next 4 sc, change to orange, sc in next 2 sc, slip st in first sc.  (8)
Rd 7: Ch 1, turn; sc in each sc around, slip st in first sc.  (8)
Rd 8: Ch 1, turn; sc in next 3 sc, 2 sc in next sc, sc in next 4 sc.  (9)
Rds 9-10: sc in each sc around.  (9)
Finish off leaving a long tail.  Stuff HORNS firmly.  Sew HORNS to HEAD.

Mewtwo, Charizard, Blastoise, Venusaur, “Pokemon: The First Movie”, and Pokemon are copyright Nintendo and their respective creators.

This pattern is an original pattern and is © by Christjan Bee (September 2018). Please do not claim this pattern as your own. If you wish to share this pattern, you may link to this pattern but please do not reprint it on your site. You may keep a copy for your own personal use, but you may not sell or distribute it, or sell items made from this pattern.

VENUSAUR

I am surprised that it took this long to make Venusaur.  Venusaur is the second evolution of Bulbasaur, which is one of the most popular Pokemon from the game.  Of course, making Venusaur completes the second stage evolutions of all three original starters for the Pokemon game.  Of course, it also means that I need to make Ivysaur, Charmeleon, and Wartortle.  This pattern includes the color lists for both Venusaur and Shiny Venusaur.

MATERIALS:
Worsted Weight Yarn (Shiny alternative in parenthesis):  Aqua, cafĂ© latte, fuchsia, green, gold, white, and black.
E crochet hook
Polyester Fiberfil
Tapestry needle

BODY:
Rd 1: With aqua, 8 sc in magic ring.  (8)
Rd 2: 2 sc in each sc around.  (16)
Rd 3: (sc in next sc, 2 sc in next sc) around.  (24)
Rd 4: (sc in next 2 sc, 2 sc in next sc) around.  (32)
Rd 5: (sc in next 3 sc, 2 sc in next sc) around.  (40)
Rd 6: (sc in next 4 sc, 2 sc in next sc) around.  (48)
Rd 7: (sc in next 5 sc, 2 sc in next sc) around.  (56)
Rd 8: (sc in next 6 sc, 2 sc in next sc) around.  (64)
Rds 9-15: sc in each sc around.  (64)
Rd 16: (sc in next 6 sc, sc2tog) around.  (56)
Rd 17: (sc in next 5 sc, sc2tog) around.  (48)
Rd 18: (sc in next 4 sc, sc2tog) around.  (40)
Rd 19: (sc in next 3 sc, sc2tog) around.  (32)
Rd 20: (sc in next 2 sc, sc2tog) around.  (24)
Rd 21: (sc in next sc, sc2tog) around.  (16)
STUFF BODY FIRMLY.
Rd 22: sc2tog around.  (8)
Finish off leaving a long tail.  Weave tail through sc of Rd 22, pull tightly, and secure.  Weave in ends.

HEAD:
Rd 1: With aqua, 8 sc in magic ring.  (8)
Rd 2: (2 sc in next 2 sc, sc in next 2 sc) around.  (12)
Rd 3: (sc in next sc, 2 sc in next 2 sc, sc in next 3 sc) around.  (16)
Rd 4: (sc in next 2 sc, 2 sc in next 2 sc, sc in next 3 sc) around.  (22)
Rd 5: sc in next 4 sc, 2 sc in next 2 sc, sc in next 4 sc, 2 sc in next sc, sc in next 4 sc, 2 sc in next 2 sc, sc in next 5 sc.  (27)
Rd 6: (sc in next 5 sc, 2 sc in next 2 sc) 3 times, sc in next 6 sc.  (33)
Rds 7-8: sc in each sc around.  (33)
Rd 9: sc in next 8 sc, sc2tog, sc in next 6 sc, sc2tog, sc in next 6 sc, sc2tog, sc in next 7 sc.  (30)
Rds 10-11: sc in each sc around.  (30)
Rd 12: (sc in next 3 sc, sc2tog) around.  (24)
Rd 13: (sc in next 2 sc, sc2tog) around.  (18)
Rd 14: (sc in next sc, sc2tog) around.  (12)
Finish off leaving a long tail.  Stuff HEAD firmly.  Sew HEAD to BODY with Rd 22 of BODY on top.

EARS (MAKE 2):
INNER EARS (MAKE 2):
Rw 1: With fuchsia, ch 2, 2 sc in second ch from hook.  (2)
Rw 2: Ch 1, turn; 2 sc in next 2 sc.  (4)
Finish off.  Weave in ends.
OUTER EARS (MAKE 2):
Rw 1: With aqua, ch 2, 2 sc in second ch from hook.  (2)
Rw 2: Ch 1, turn; 2 sc in next 2 sc.  (4)
Rd 3: Holding INNER EARS and OUTER EARS together and working through both thicknesses, ch 1, sc in next 2 Rws, 2 sc in free loop of foundation ch, sc in next 2 Rws.
Finish off leaving a long tail.  Sew EARS to HEAD.

EYES, MOUTH, AND TEETH:
Embroider EYES, MOUTH and TEETH on HEAD of VENUSAUR.

EYELIDS (MAKE 2):
Rw 1: With aqua, ch 5, slip st in second ch from hook, sc in next 2 ch, slip st in next ch.  (4)
Finish off leaving a long tail.  Sew EYELIDS to HEAD above EYES.

TOENAILS (MAKE 12):
Rd 1: With white, ch 2, 4 sc in second ch from hook working around ch.  (4)
Rd 2: sc in each sc around.  (4)
Finish off.  Weave in ends.

FRONT LEGS (MAKE 2):
Rd 1: With aqua, 6 sc in magic ring.  (6)
Rd 2: 2 sc in each sc around.  (12)
Rd 3: sc in next 3 sc, (holding next sc on FRONT LEGS and first sc on TOENAILS together and working through both thicknesses, sc in next 2 sc) 3 times, sc in next 3 sc.
Rd 4: (sc in next 3 sc, 2 sc in next sc) around.  (15)
Rds 5-8: sc in each sc around.  (15)
Rd 9: (sc in next 4 sc, 2 sc in next sc) around.  (18)
Rd 10: sc in each sc around.  (18)
Rd 11: (sc in next 7 sc, sc2tog) around.  (16)
Rd 12: sc in each sc around.  (16)
Rd 13: (sc in next 2 sc, sc2tog) around.  (12)
Rd 14: sc in each sc around.  (12)
Rd 15: (sc in next sc, sc2tog) around.  (8)
STUFF FRONT LEGS FIRMLY.
Rd 16: sc in each sc around.  (8)
Finish off leaving a long tail.  Weave tail through sc of Rd 16, pull tightly and secure.  Sew FRONT LEGS to BODY.

HIND LEGS (MAKE 2):
Rd 1: With aqua, 6 sc in magic ring.  (6)
Rd 2: 2 sc in each sc around.  (12)
Rd 3: 2 sc in next sc, sc in next 2 sc, (holding next sc on HIND LEGS and first sc on TOENAILS together and working through both thicknesses, sc in next 2 sc) 3 times, sc in next 2 sc on HIND LEGS, 2 sc in next sc.
Rd 4: 2 sc in next sc, sc in next 13 sc.  (15)
Rd 5: sc in each sc around.  (15)
Rd 6: (sc in next 4 sc, 2 sc in next sc) around.  (18)
Rds 7-11: sc in each sc around.  (18)
Rd 12: (sc in next 7 sc, sc2tog) around.  (16)
Rd 13: sc in each sc around.  (16)
Rd 14: (sc in next 6 sc, sc2tog) around.  (14)
Rd 15: sc in each sc around.  (14)
Rd 16: (sc in next 5 sc, sc2tog) around.  (12)
Rd 17: sc in each sc around.  (12)
STUFF HIND LEGS FIRMLY.
Rd 18: sc2tog around.  (6)
Finish off leaving a long tail.  Weave tail through sc of Rd 18, pull tightly and secure.  Sew HIND LEGS to BODY.

LEAVES (MAKE 4):
Rw 1: With green, ch 2, 2 sc in second ch from hook.  (2)
Rws 2-3: Ch 1, turn; sc in each sc across.  (2)
Rw 4: Ch 1, turn; 2 sc in next 2 sc.  (4)
Rws 5-7: Ch 1, turn; sc in each sc across.  (4)
Rw 8: Ch 1, turn; 2 sc in next sc, sc in next 2 sc, 2 sc in next sc.  (6)
Rws 9-16: Ch 1, turn; sc in each sc across.  (6)
Rd 17: Working in side of Rws, ch 1, (sc in next Rw, ch 3) in next 16 Rws, working in free loop of foundation ch, (sc, ch 3, sc, ch 3) in next ch, working in side of Rws, (sc in next Rw, ch 3) in next 15 Rws, sc in next Rw.
Finish off with first 3 LEAVES.  DO NOT FINISH OFF IN FOURTH LEAVES.
Rd 18: Holding side of Rd 17 of 1st LEAF and beginning side of Rd 17 of 4th LEAF together and working through both thicknesses, sc in next sc, sc in next on 1st LEAF, sc2tog, sc in next 2 sc, sc tog next sc on 3rd LEAF and side of Rd 17 of both 1st LEAF and side of Rd 17 of 2nd LEAF, sc in next 2 sc on 2nd LEAF, sc2tog, sc in next sc, holding side of Rd 17 on 2nd LEAF and side of Rd 17 of 3rd LEAF together and working through both thicknesses, sc in next sc, sc2tog on 3rd LEAF, sc in next 2 sc, sc2tog, holding side of Rd 17 on 3rd LEAF and side of Rd 17 on 4th LEAF together and working through both thicknesses, sc in next sc, sc2tog on 4th LEAF, sc in next 2 sc, sc2tog.  (21)
Rd 19: (sc in next sc, sc2tog) around.  (14)
Rd 20: sc2tog around.  (7)
Finish off leaving a long tail.  Weave tail through sc of Rd 20, pull tightly and secure.  Sew LEAVES to BODY.

BRANCH:
Rd 1: With cafĂ© latte, 6 sc in magic ring.  (6)
Rd 2: 2 sc in each sc around.  (12)
Rd 3: Working in front loops only, sc in each sc around.  (12)
Rds 4-10: sc in each sc around.  (12)
Finish off.  Stuff BRANCH firmly.  Sew BRANCH to BODY in center of LEAVES.

FLOWER PETALS (MAKE 6):
Rw 1: With fuchsia, ch 5, sc in second ch from and in each ch across.  (4)
Rws 2-12: Ch 1, turn; sc in each sc across.  (4)
Finish off.  Weave in ends.  Using white, embroider markings on FLOWER PETALS.

GOLD FLOWER CENTER:
Rd 1: With gold, 6 sc in magic ring.  (6)
Rd 2: 2 sc in each sc around.  (12)
Rd 3: Working in front loops only, sc in each sc around.  (12)
Rd 4: (slip st, ch 3) in each sc around.
Finish off leaving a long tail.  Sew GOLD FLOWER CENTER to BRANCH working through FLOWER PETALS.

Ivysaur, Venusaur, Shiny Venusaur, Charmeleon, Wartortle, and Pokemon are copyright Nintendo and their creators.

This pattern is an original pattern and is © by Christjan Bee (September 2018). Please do not claim this pattern as your own. If you wish to share this pattern, you may link to this pattern but please do not reprint it on your site. You may keep a copy for your own personal use, but you may not sell or distribute it, or sell items made from this pattern.